I decided to get myself a split keyboard. Partly because I got influenced by theprimagen (just as he got me into neovim btw) and a friend of mine, partly because I got wrist pain when I had a long day of coding. As my career as a software engineer just started, I don’t really want to risk having issues with the joints in my wrists so I looked a little bit into ergonomics. That got me into the space of split keyboards. I personally got the Sofle Choc Pro from keebart.com, a German store and pretty much the only store where I could buy prebuilt keyboards without importing them, which also don’t cost like 400€. Don’t get me wrong, they are still expensive, I paid a little over 200€ but it’s still better than having import fees, non-disclosed taxes and shipping on an already heavy price. Anyways, it arrived and here I will collect my experiences with it over the next few months.
I intend to publish multiple posts on this to have some kind of timeline or diary if you will, to note down the development I go through. Part 1 will contain my thoughts and experiences from day one up until about a month in.
day 1
review and first impression
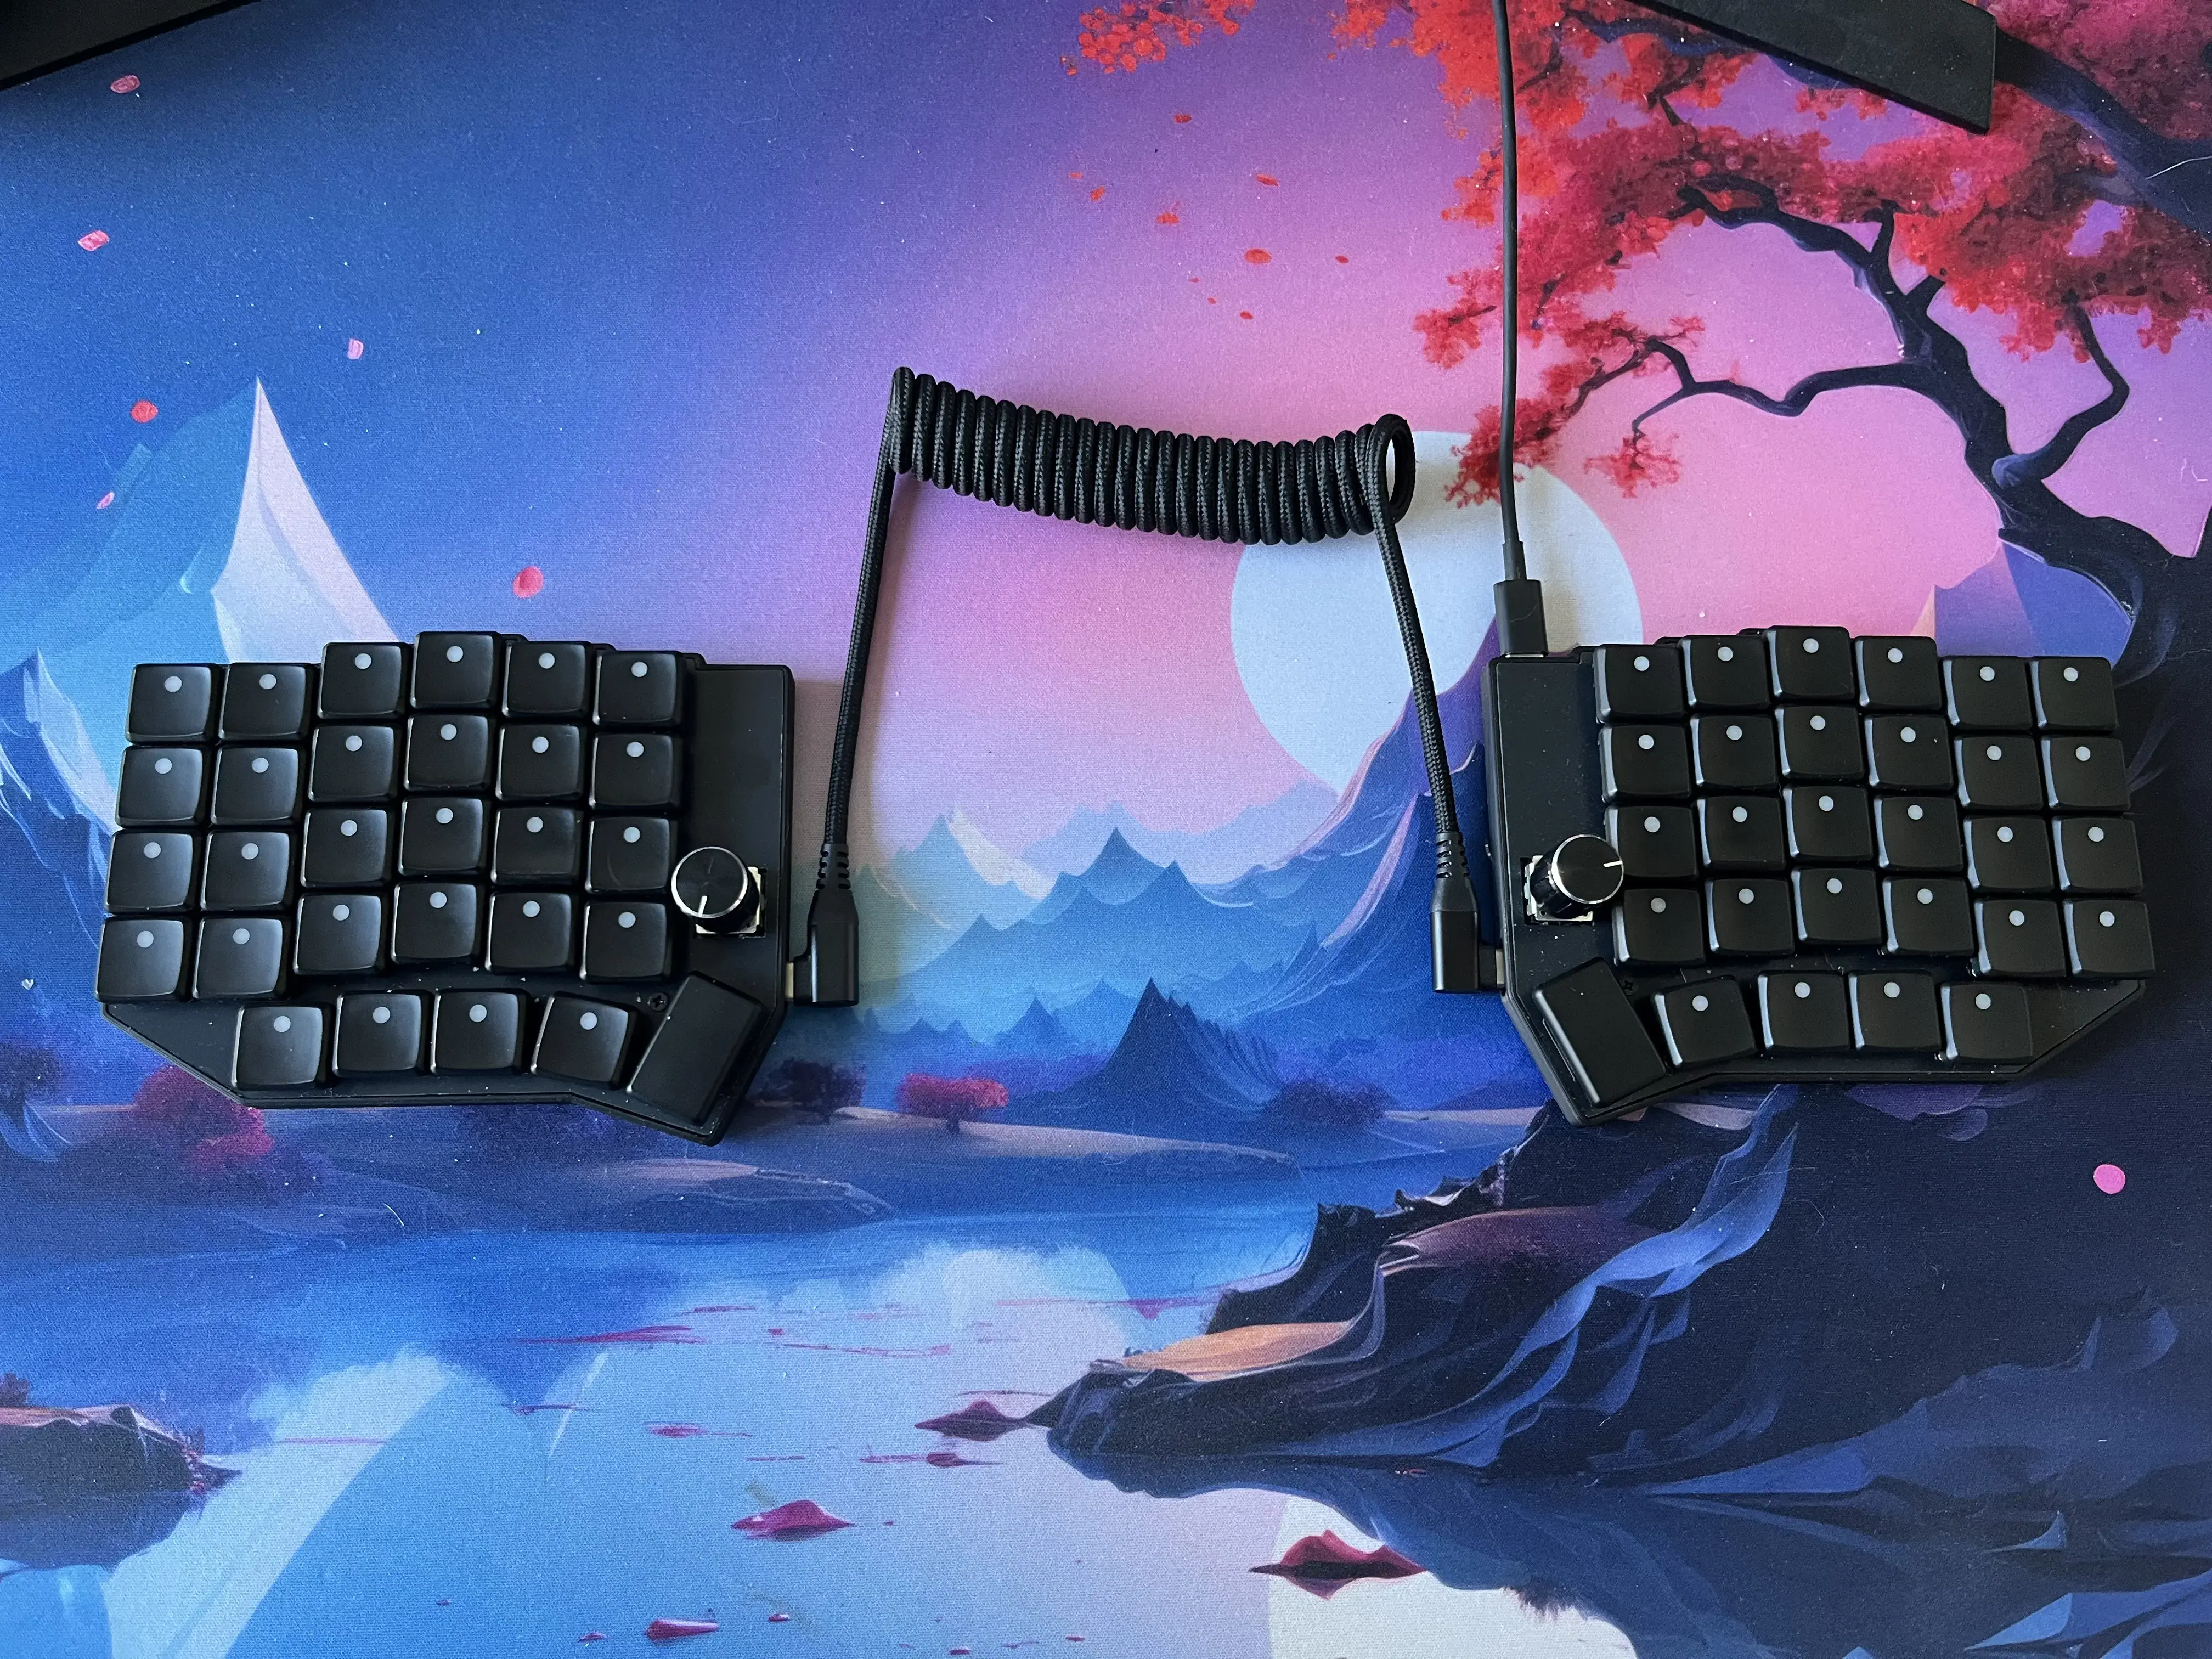
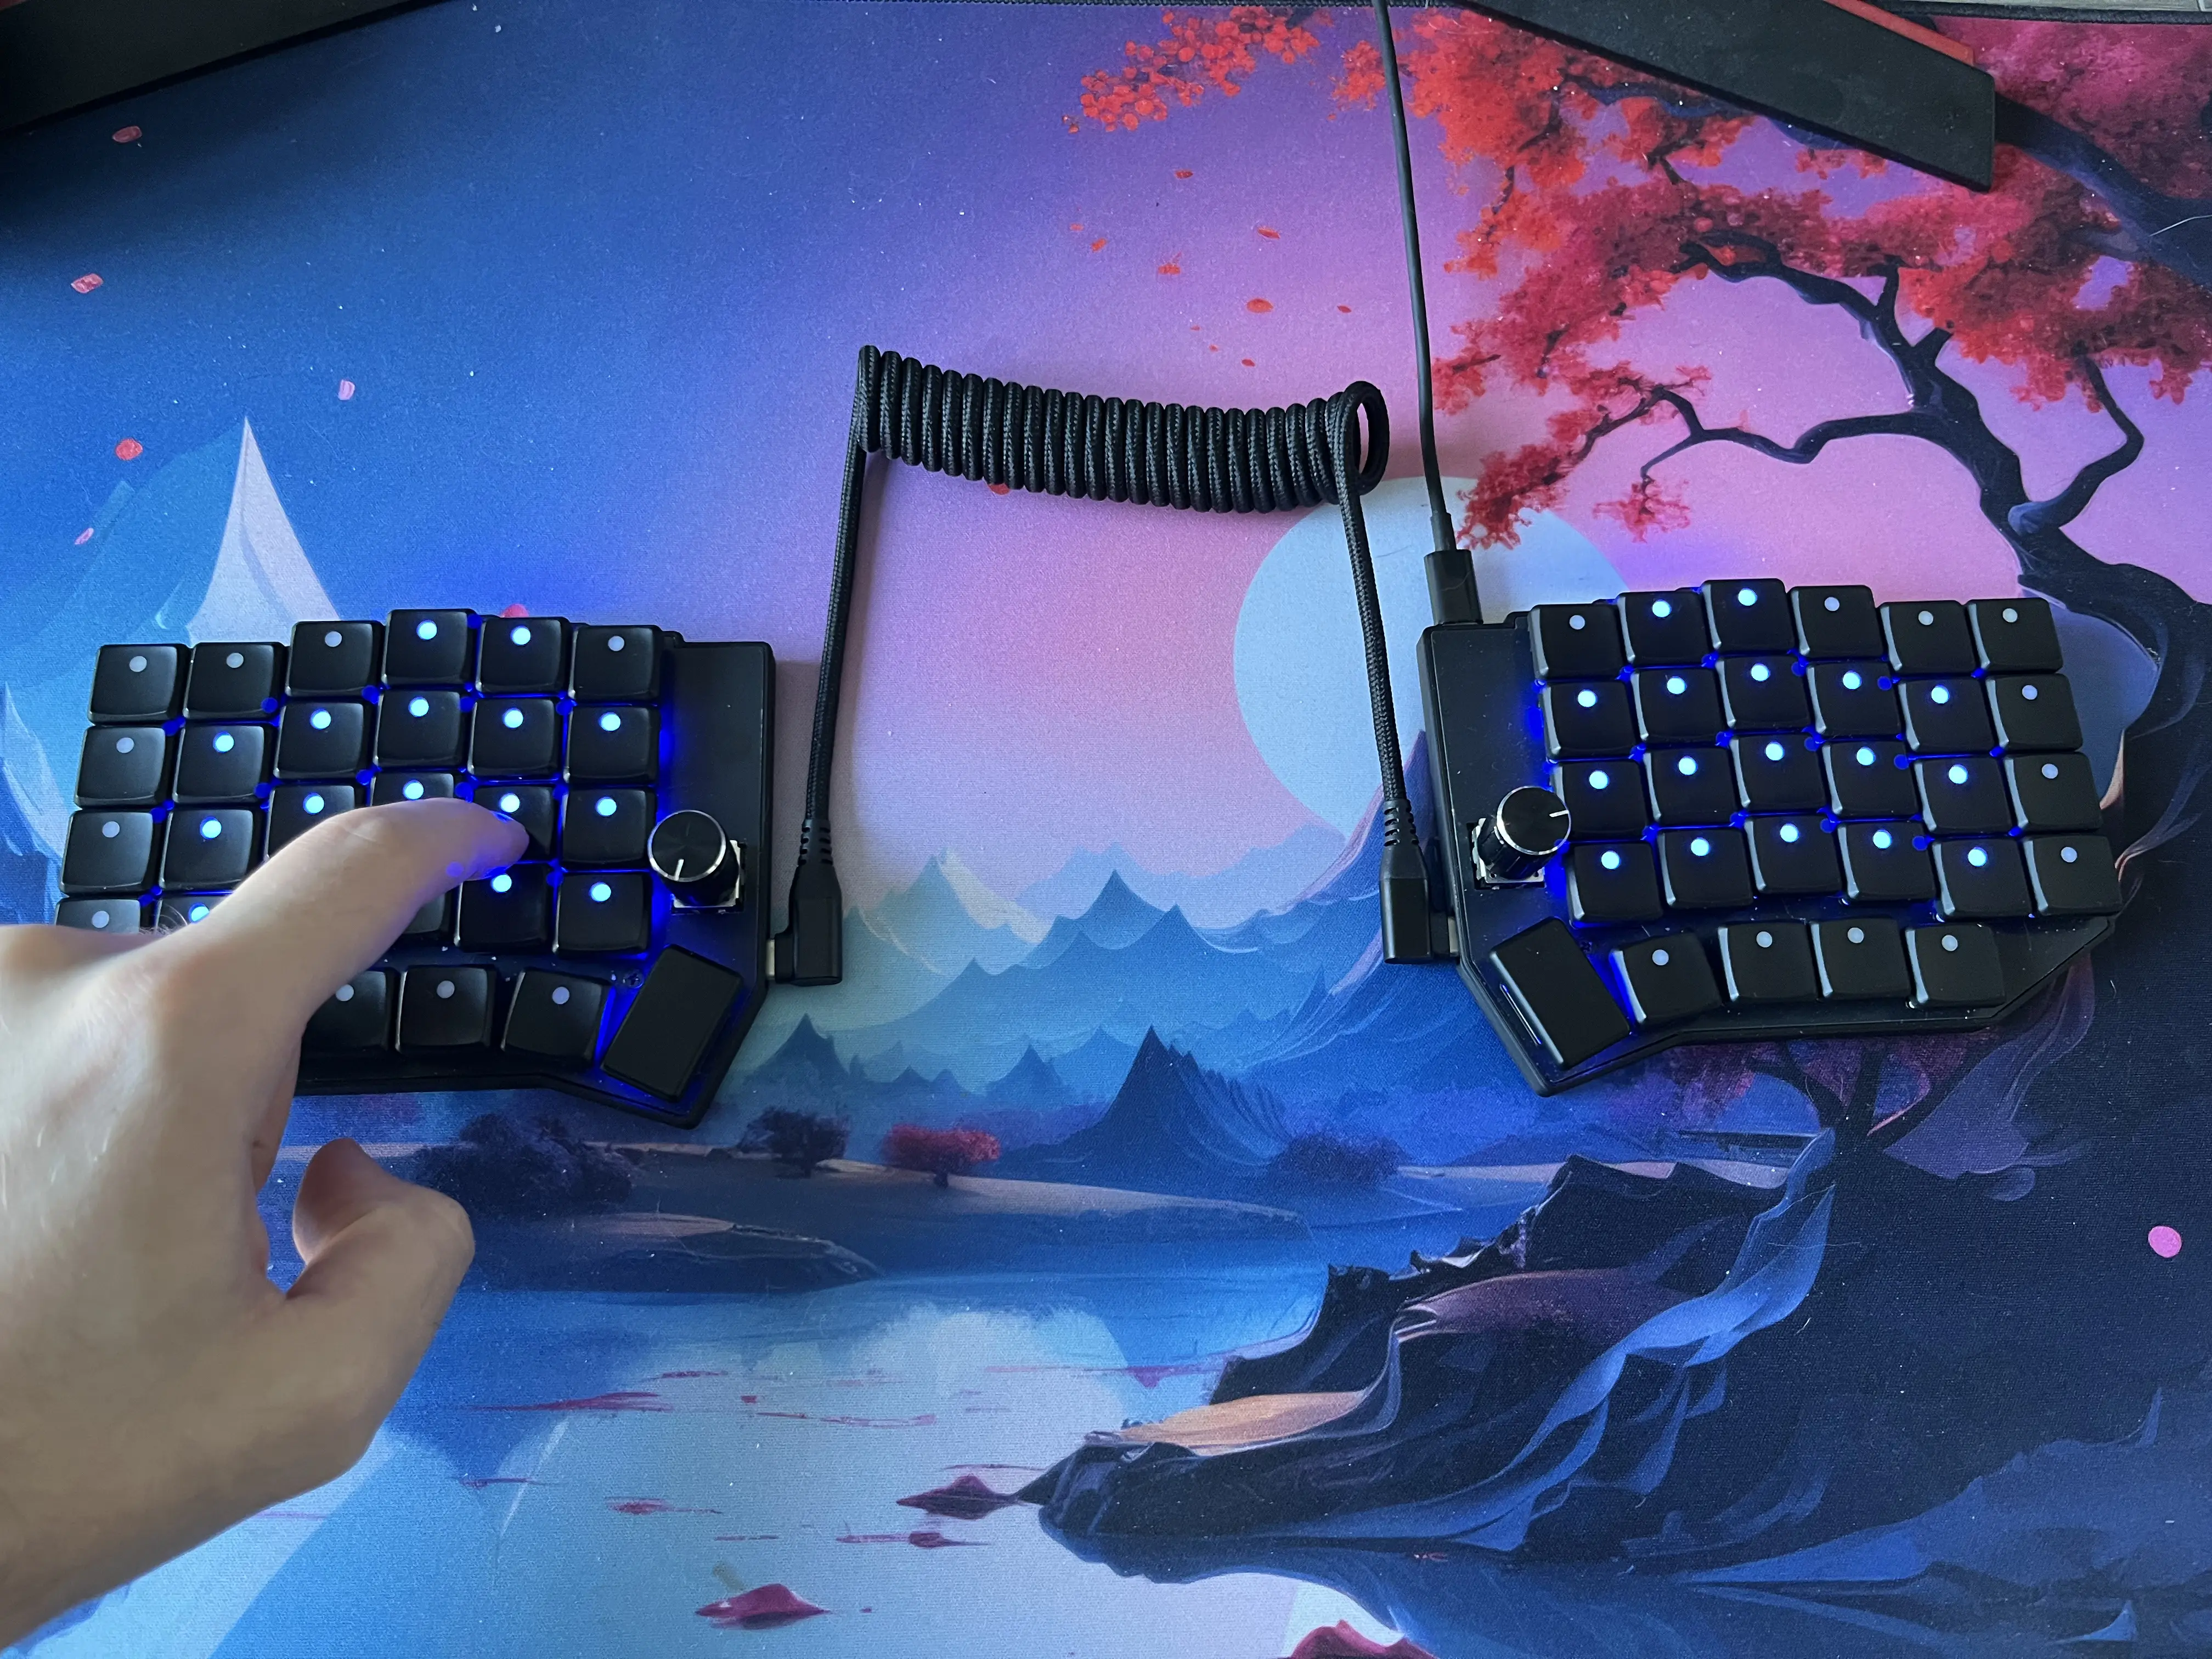
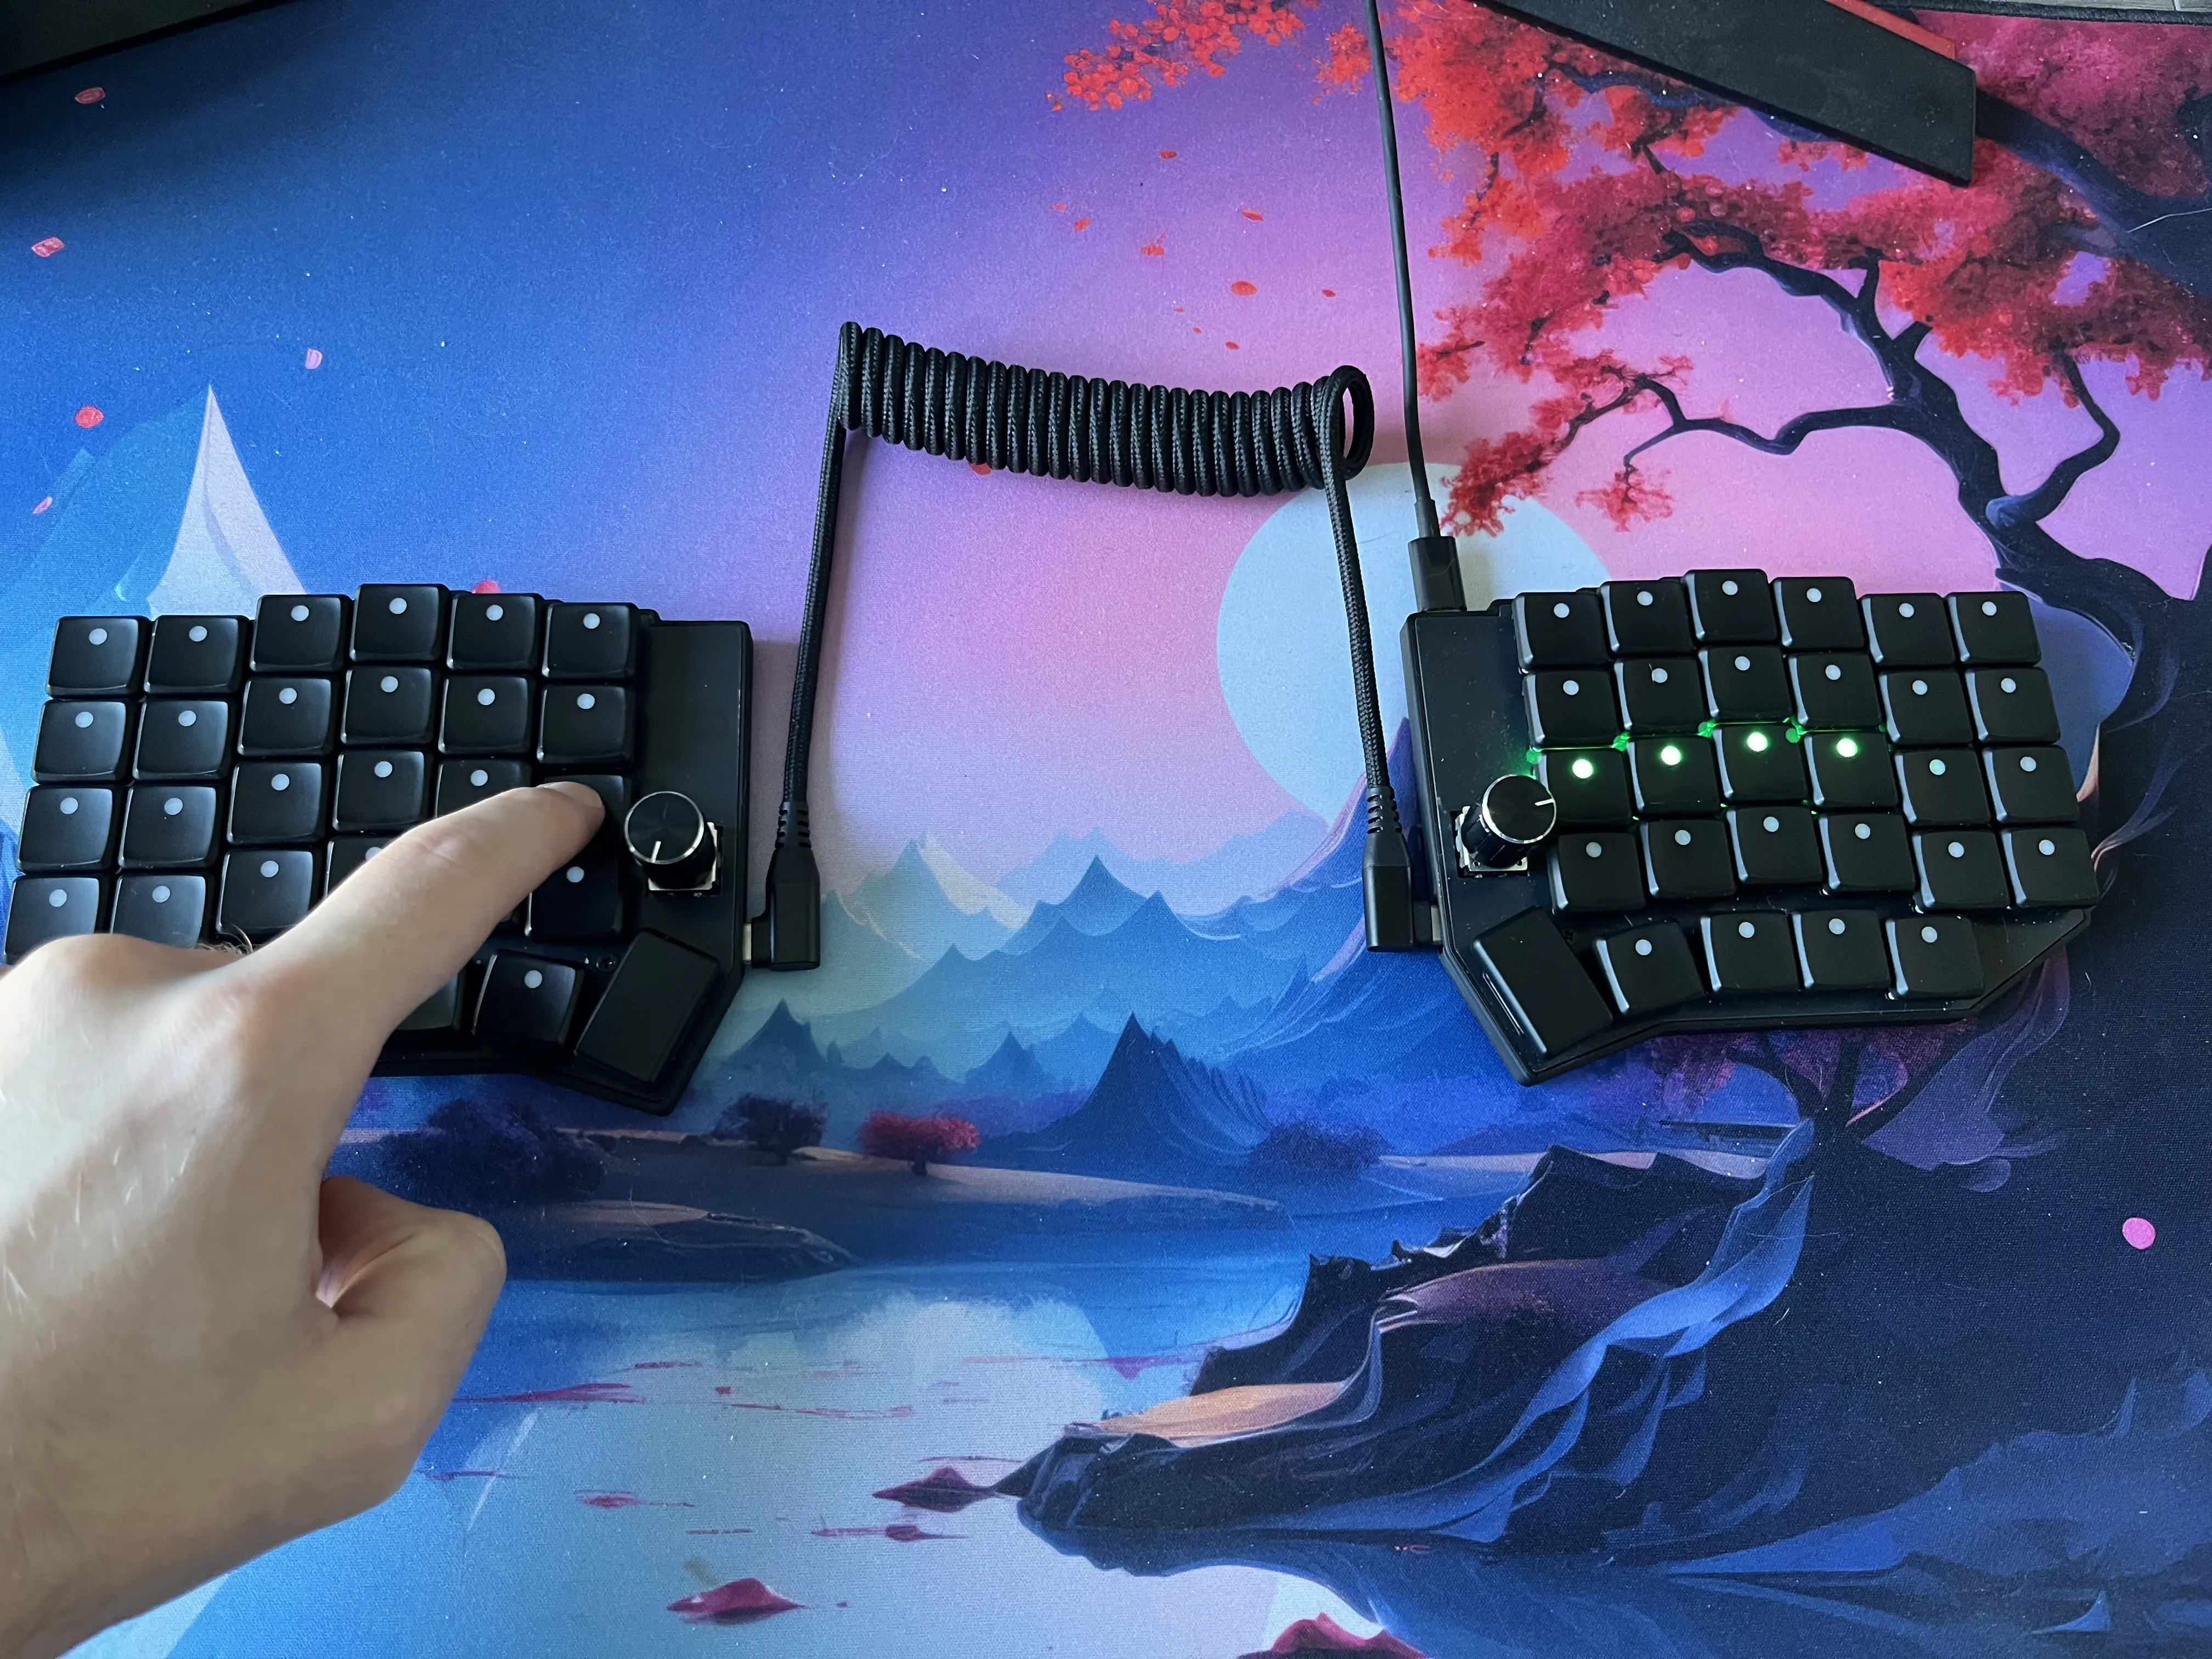
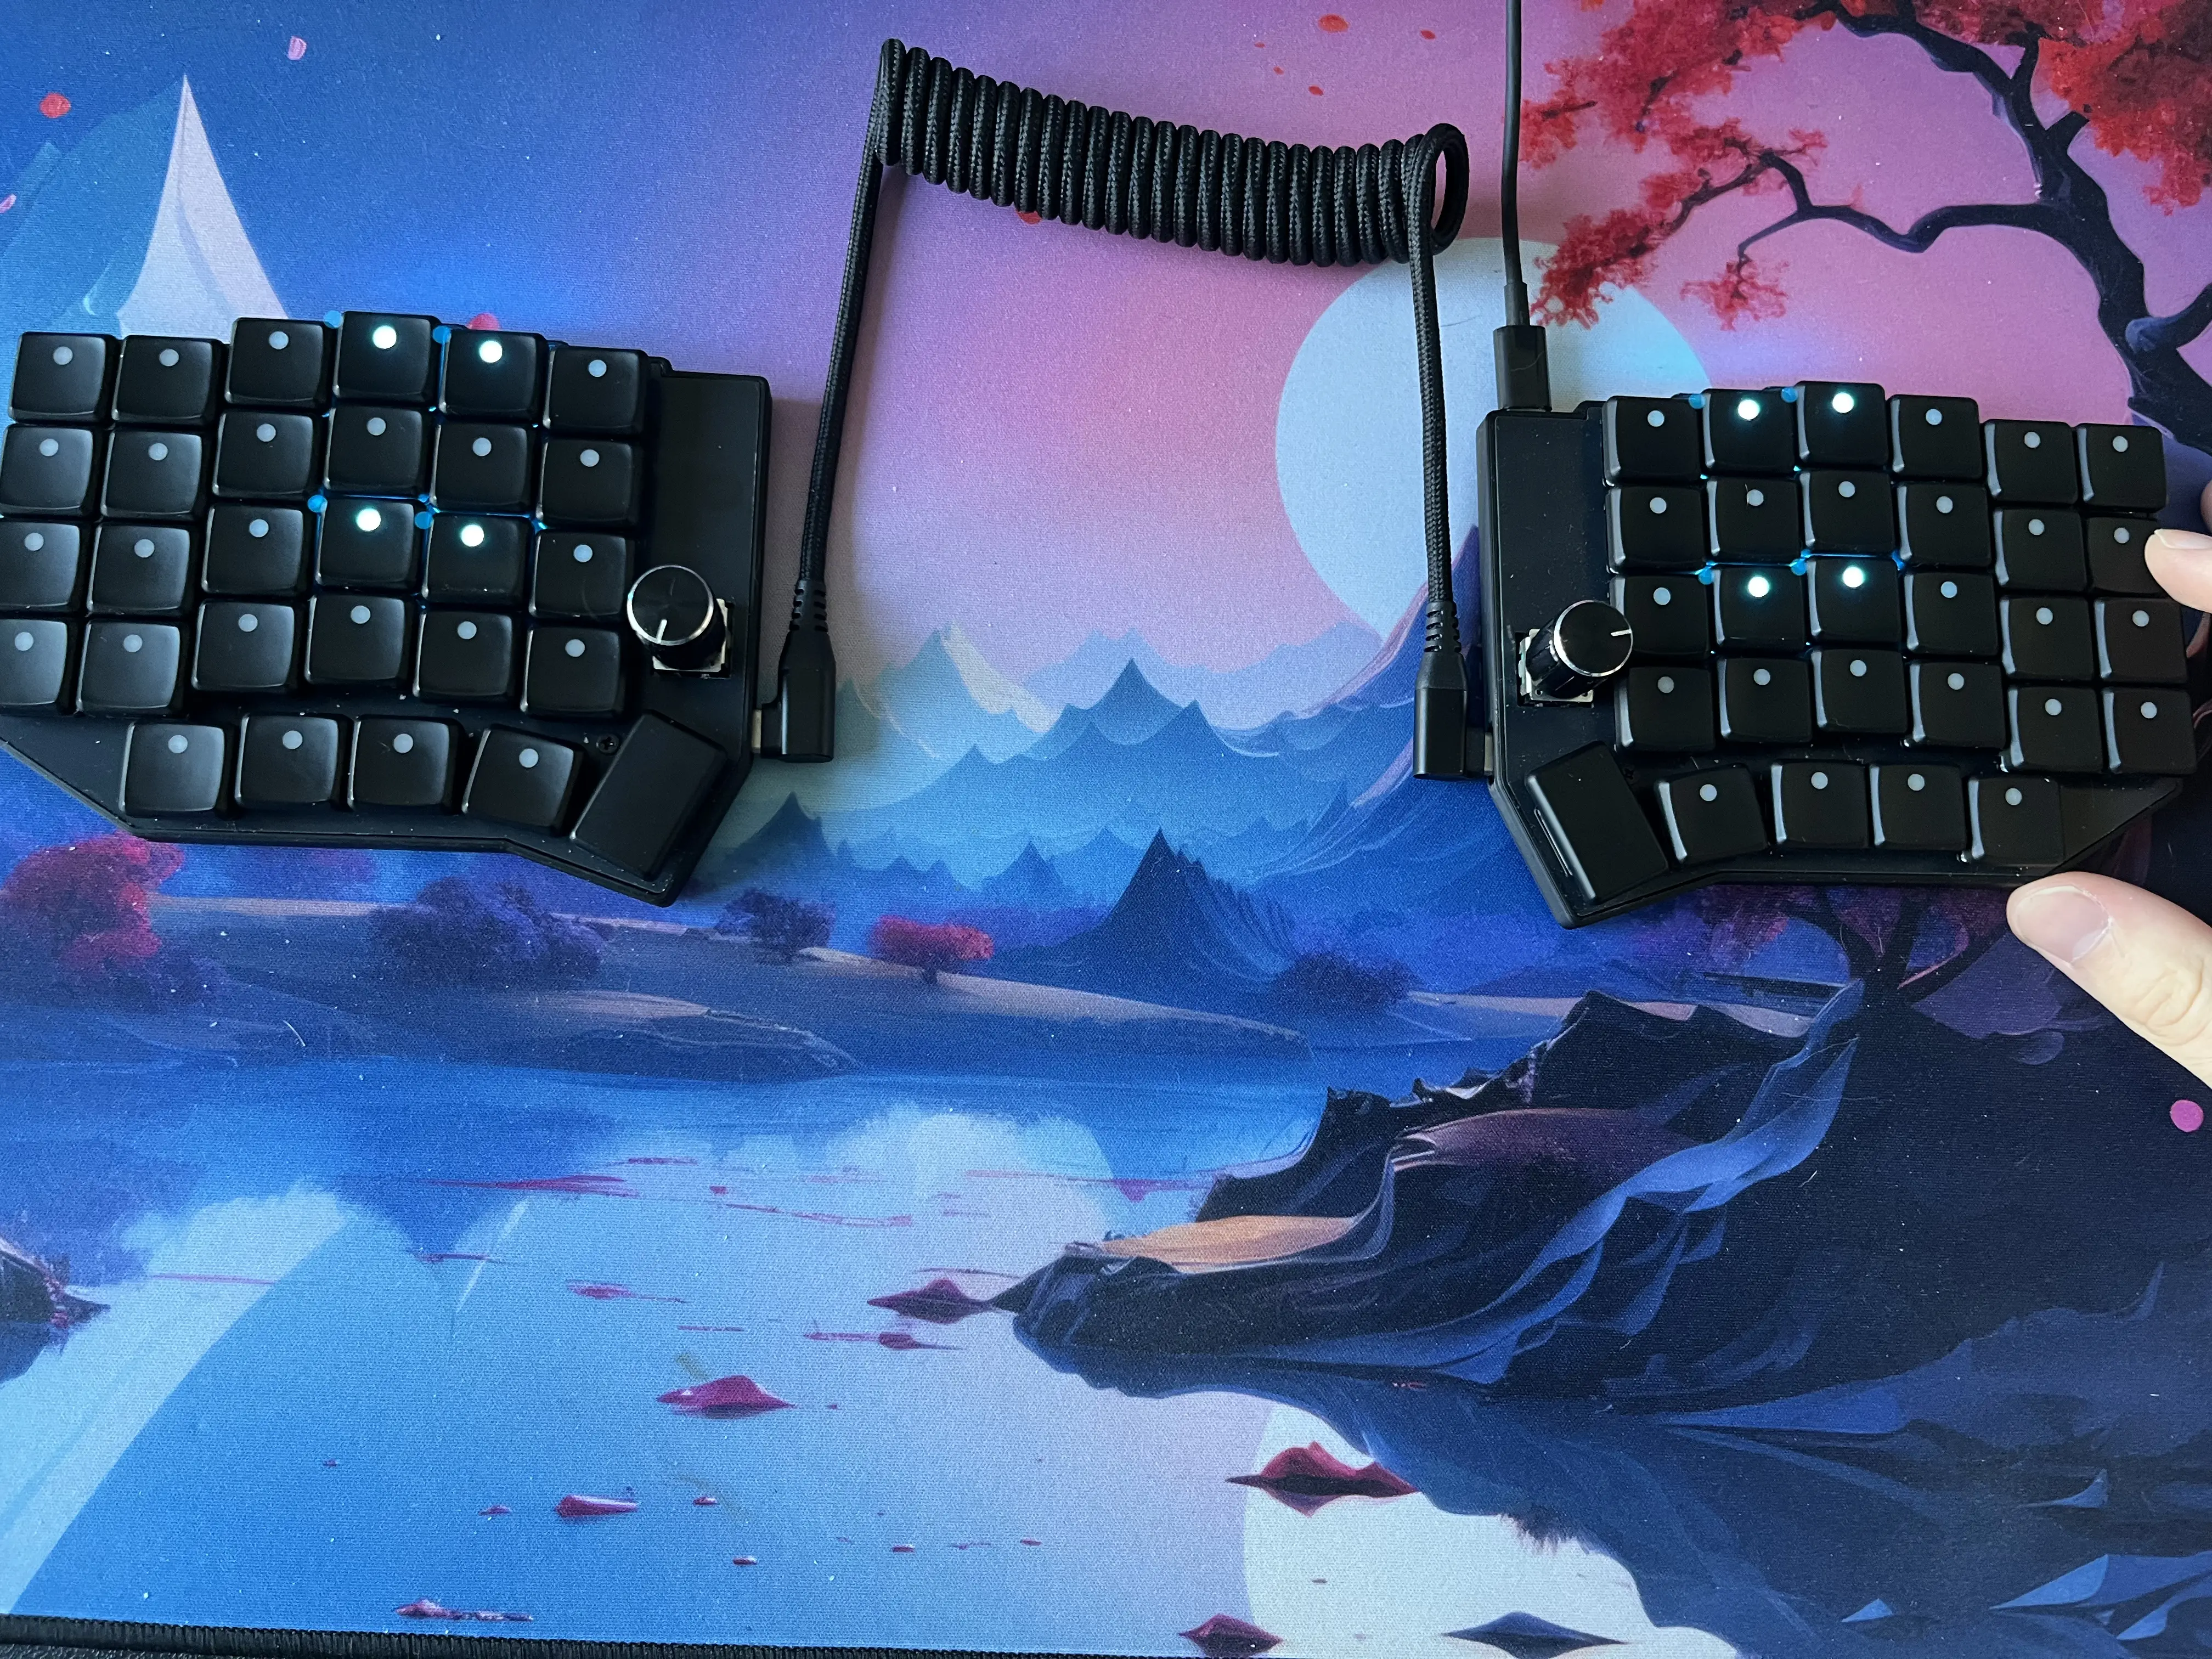
Immediately after it arrived I was surprised by the small package it came in. Compared to a normal mechanical keyboard it was less rectangular and more square and also way more compact. Before I used a 75% mechanical keyboard and compared to that package it was tiny. Opening it got me even more surprised, as the package wasn’t even filled up. It contained the travel case from keebart, which in turn held the keyboard itself with the connection cable to the pc. Next to it was a box with the keycaps. I deliberately chose the MBK Dots, which means no letters. Every key looks the same, it has a single dot which lets the RGB lighting through. There are two keycaps that have very small groves at the bottom to mark the home position. It is almost invisible when looking at it but just enough to feel it and find the position comfortably. It also had two larger caps without the dots for the bigger thumb keys, although there were two extra normal caps I could put there instead. Except for the caps, the whole keyboard is prebuilt and the quality on first glance is very solid. It is 3D printed plastic but makes a good impression. This makes the keyboard really light, especially since there are two halves, but each half has four rubber feet so despite the light weight it doesn’t move when used. This keyboard also comes with two rotary encoders, one on each half, that also act as additional buttons. The switches are Kailh Choc v1 mechanical switches, I chose the brown tactiles. The mechanical keyboard I used before has standard linear switches so the sensitivity difference takes some getting used to. All in all the first impression definitely went in favour of the keyboard and I was looking forward to trying it out.
pluggin in
The keyboard comes preinstalled with a custom version of the vial firmware, which itself is a fork of the open source QMK firmware. This means I can use the vial editor to reconfigure my keyboard layout, add more layers, program macros and key combinations, choose the rgb lighting and many more things. The standard firmware uses a standard qwerty layout with some layer configuration. I haven’t looked into it too much since I want to start with a different layout anyways but I had a few typing tries. This was incredibly difficult because i didn’t touch type in the “correct” way before, my hands both went over the whole keyboard so forcing myself to type correctly was a challenge.
custom layout
I looked around for a different layout to fully take advantage of the ergonomic keyboard and its multiple layers. I found Colemak and chose it as my first try for learning to use this keyboard. I created the base layer as after the colemak layout, but later changed the right home row back to the qwerty one. That change came from me using neovim and the keys “hjkl” for the main navigation inside the editor. As this was my natural navigation I wanted to keep it that way. I swapped the two keys in the layout and am now practicing typing with it on monkeytype. As soon as I get more comfortable with typing normal englisch with it, I will gradually add more layers for programming specific stuff like symbol placements. Right now, I am not used to it so typing anything feels like I am learning how to speak again. This is very weird and frustrating. But, it was never the point to be easy. So I will go through with it, practice typing at home and soon will be able to at least slowly code with the new layout. For the time being, the two days a week I go into the office, I’ll take my old keyboard with me, as the efficiency is simply too far gone. My last typing test on monkeytype for today was at like 12-15 wpm, whereas before I averaged around 70-80 wpm. I will try to reach around 30 wpm before I fully transition to the new keyboard also at work. This is assuming I can confidently type the characters I want to type without having to look up the layout somewhere, even if the typing itself is slow. Until then, my desk has two keyboards connected to my computer.
day 2
I practiced quite a bit, not as much as I wanted to but still enough to reach an average of about 20 wpm on monkeytype. I also played around with QMK and added different colors depending on the layer. When I activate a layer now, only the keys active or changed in that layer light up. I also reached a point where i no longer need to have my keymap open on when I want to type something. Still very slow, but no longer limited by my ability to find a letter on the screen.
For symbols I am still shuffling the placements around and add them as I find out that I need them. I put them all on the second layer and will switch their positions once I think I have everything.
after 2 weeks
I started to use the keyboard as my daily driver pretty much as soon as I got it, with only a single day of switching back at work because I needed to finish something quickly. In this time I had quite a few layout changes, especially with the symbols, and I am not quite happy with them yet. This will need some more getting used to and maybe some more layout messing.
Right now, I am up to a speed of around 32 - 35 WPM on monkeytype. While is not particularly fast, it is fast enough so that I can actually get some work done.
I think this is the point where I can show the keyboard and my current layout.
Showcase
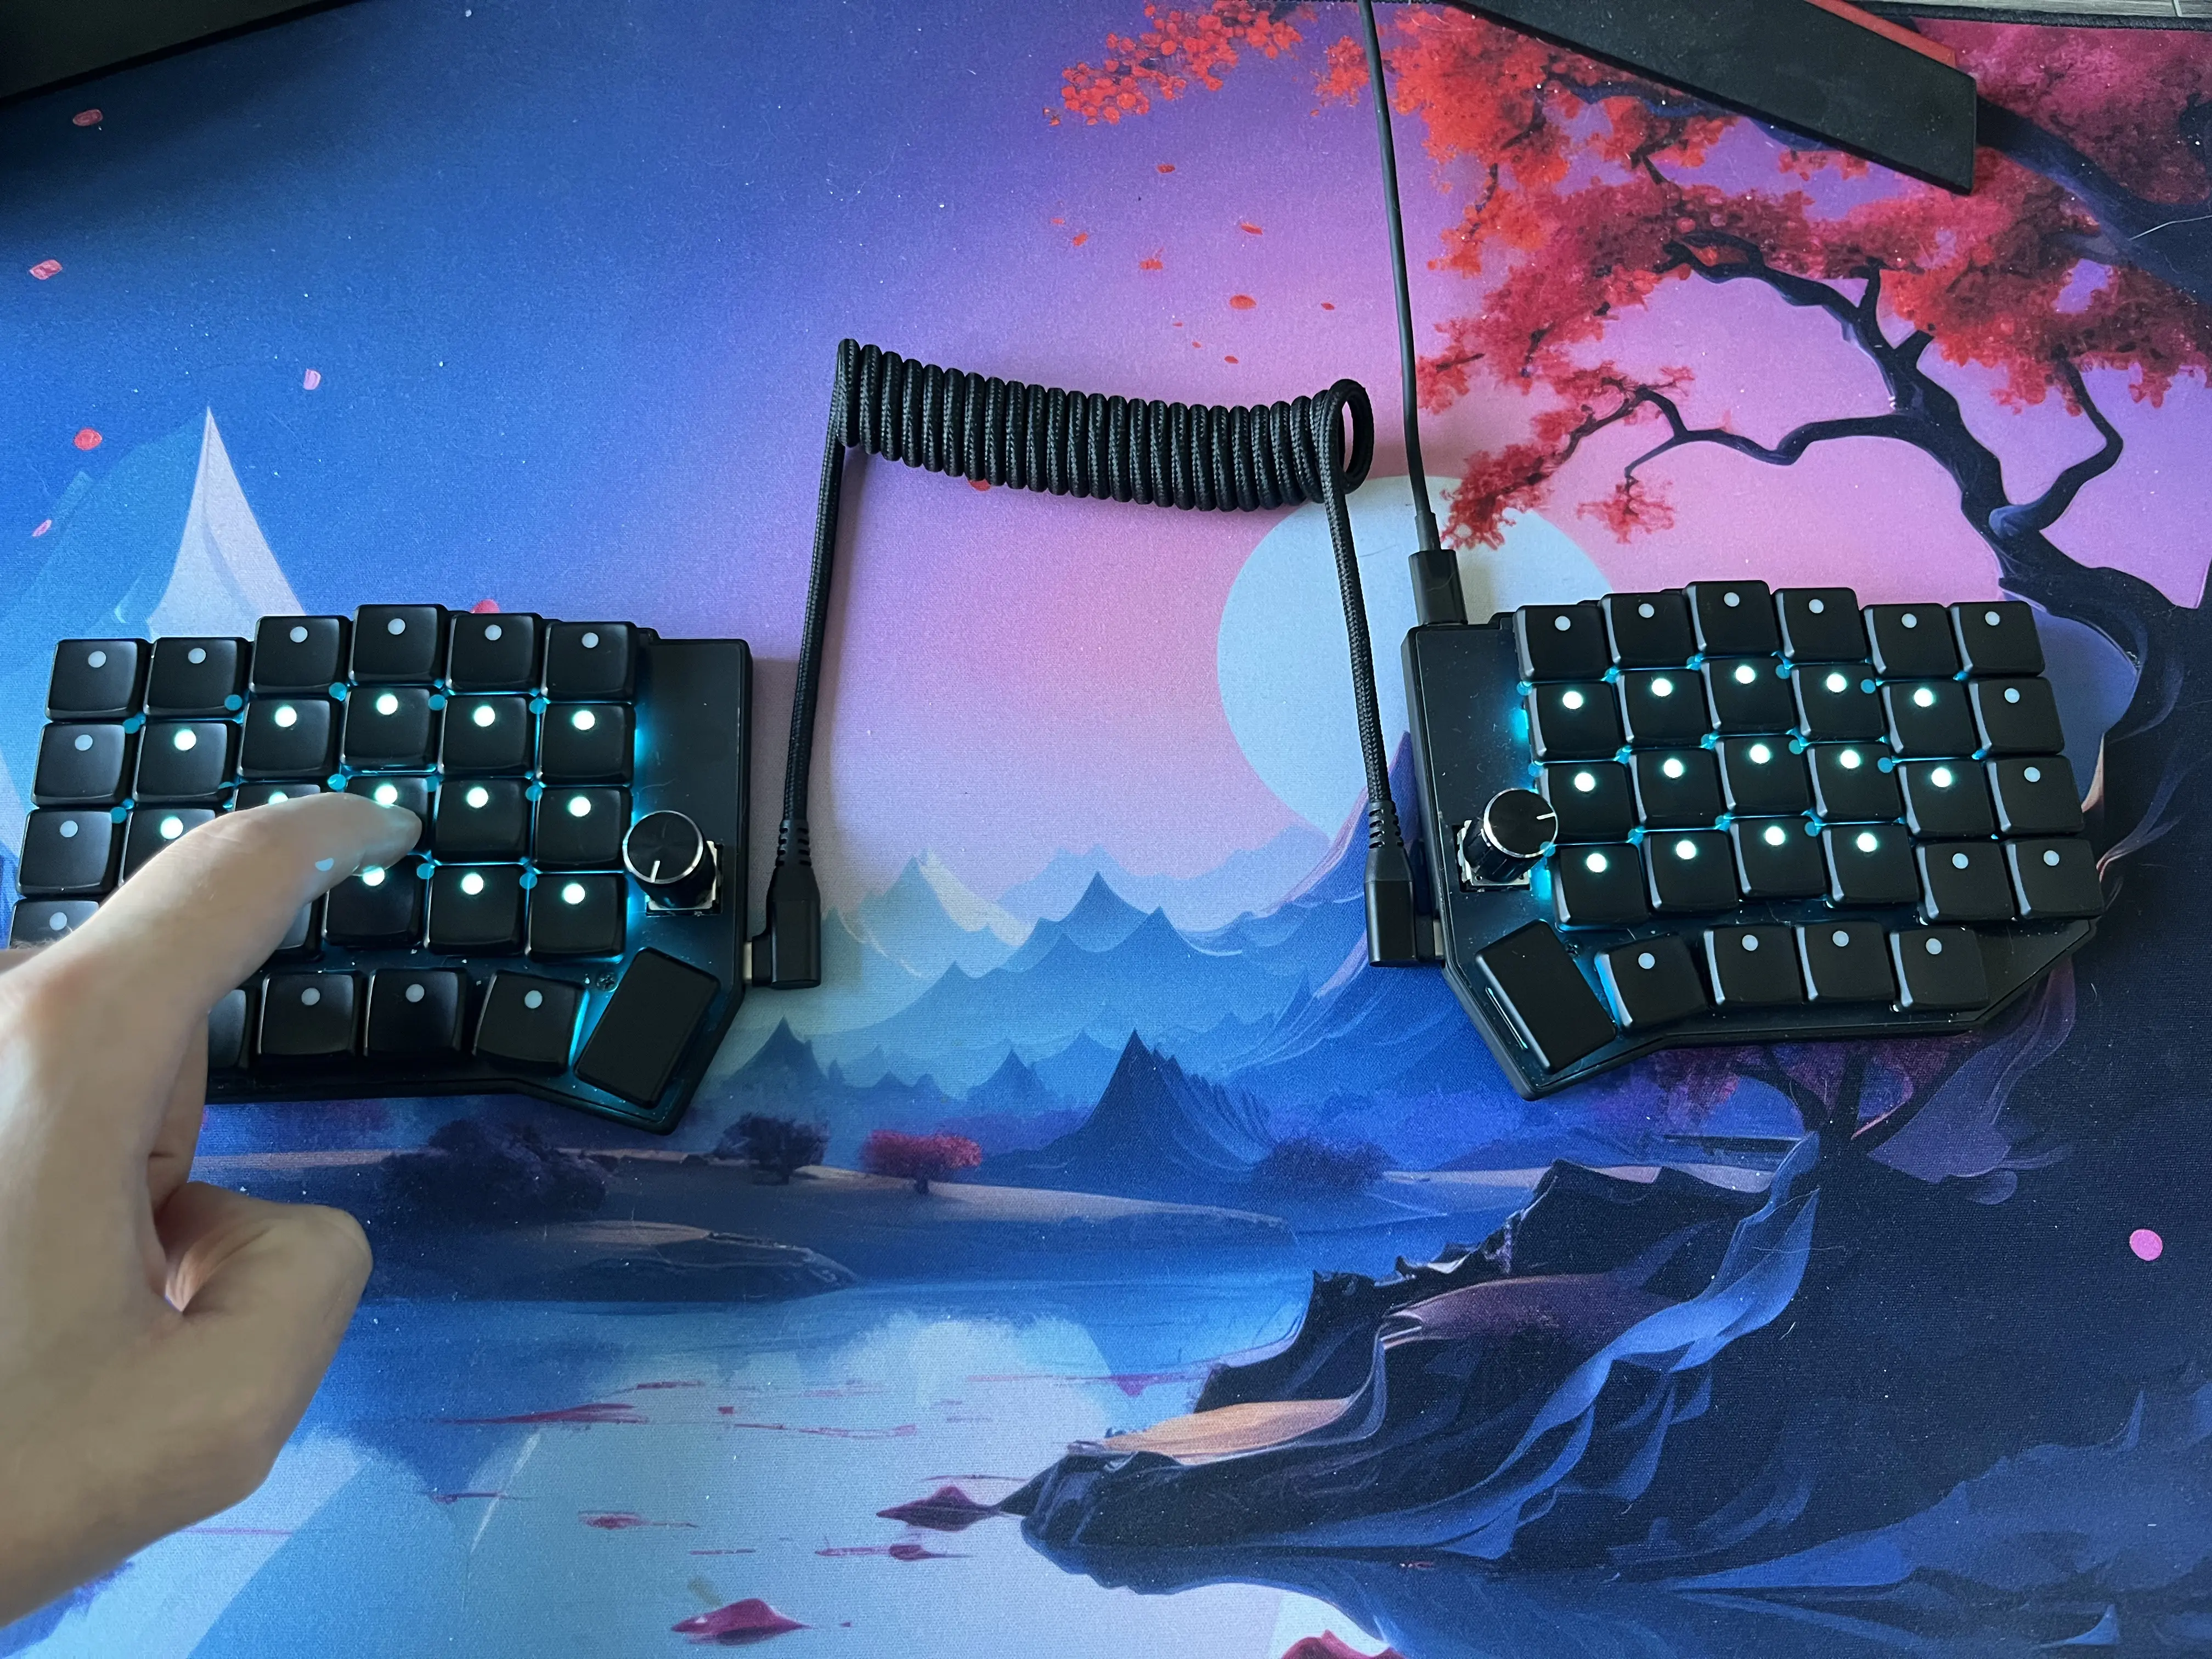
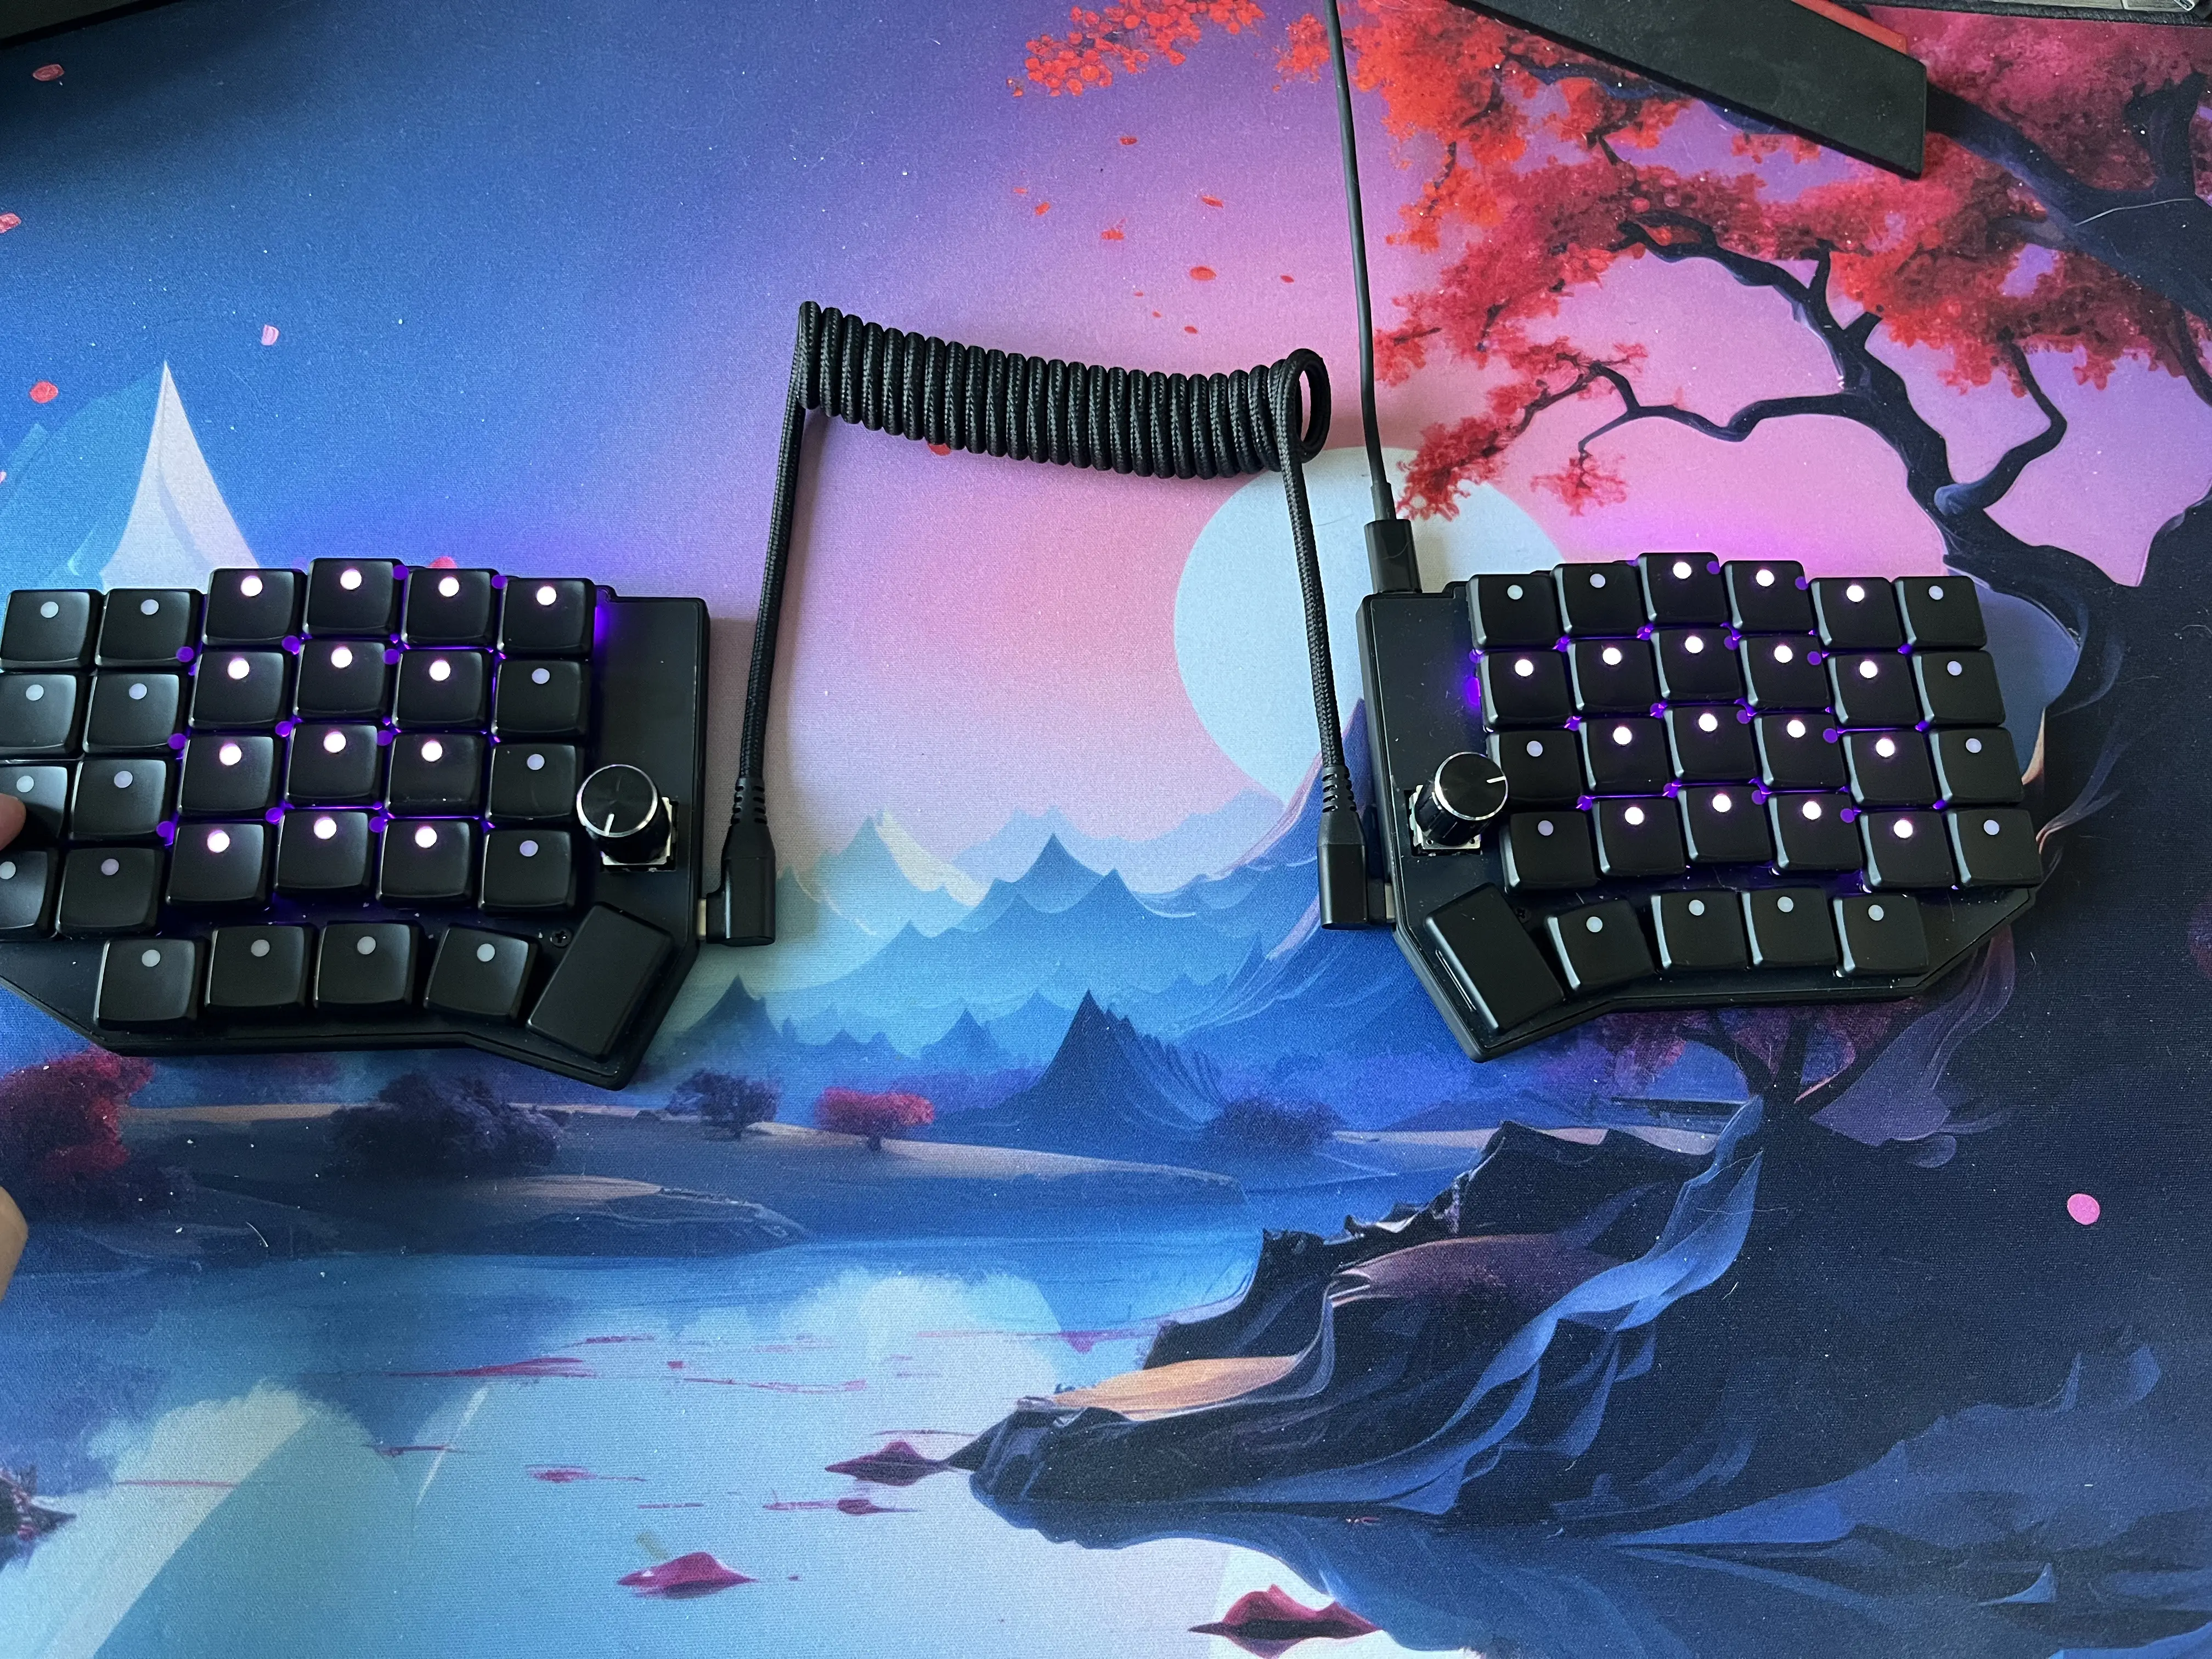
This is the keyboard in question:

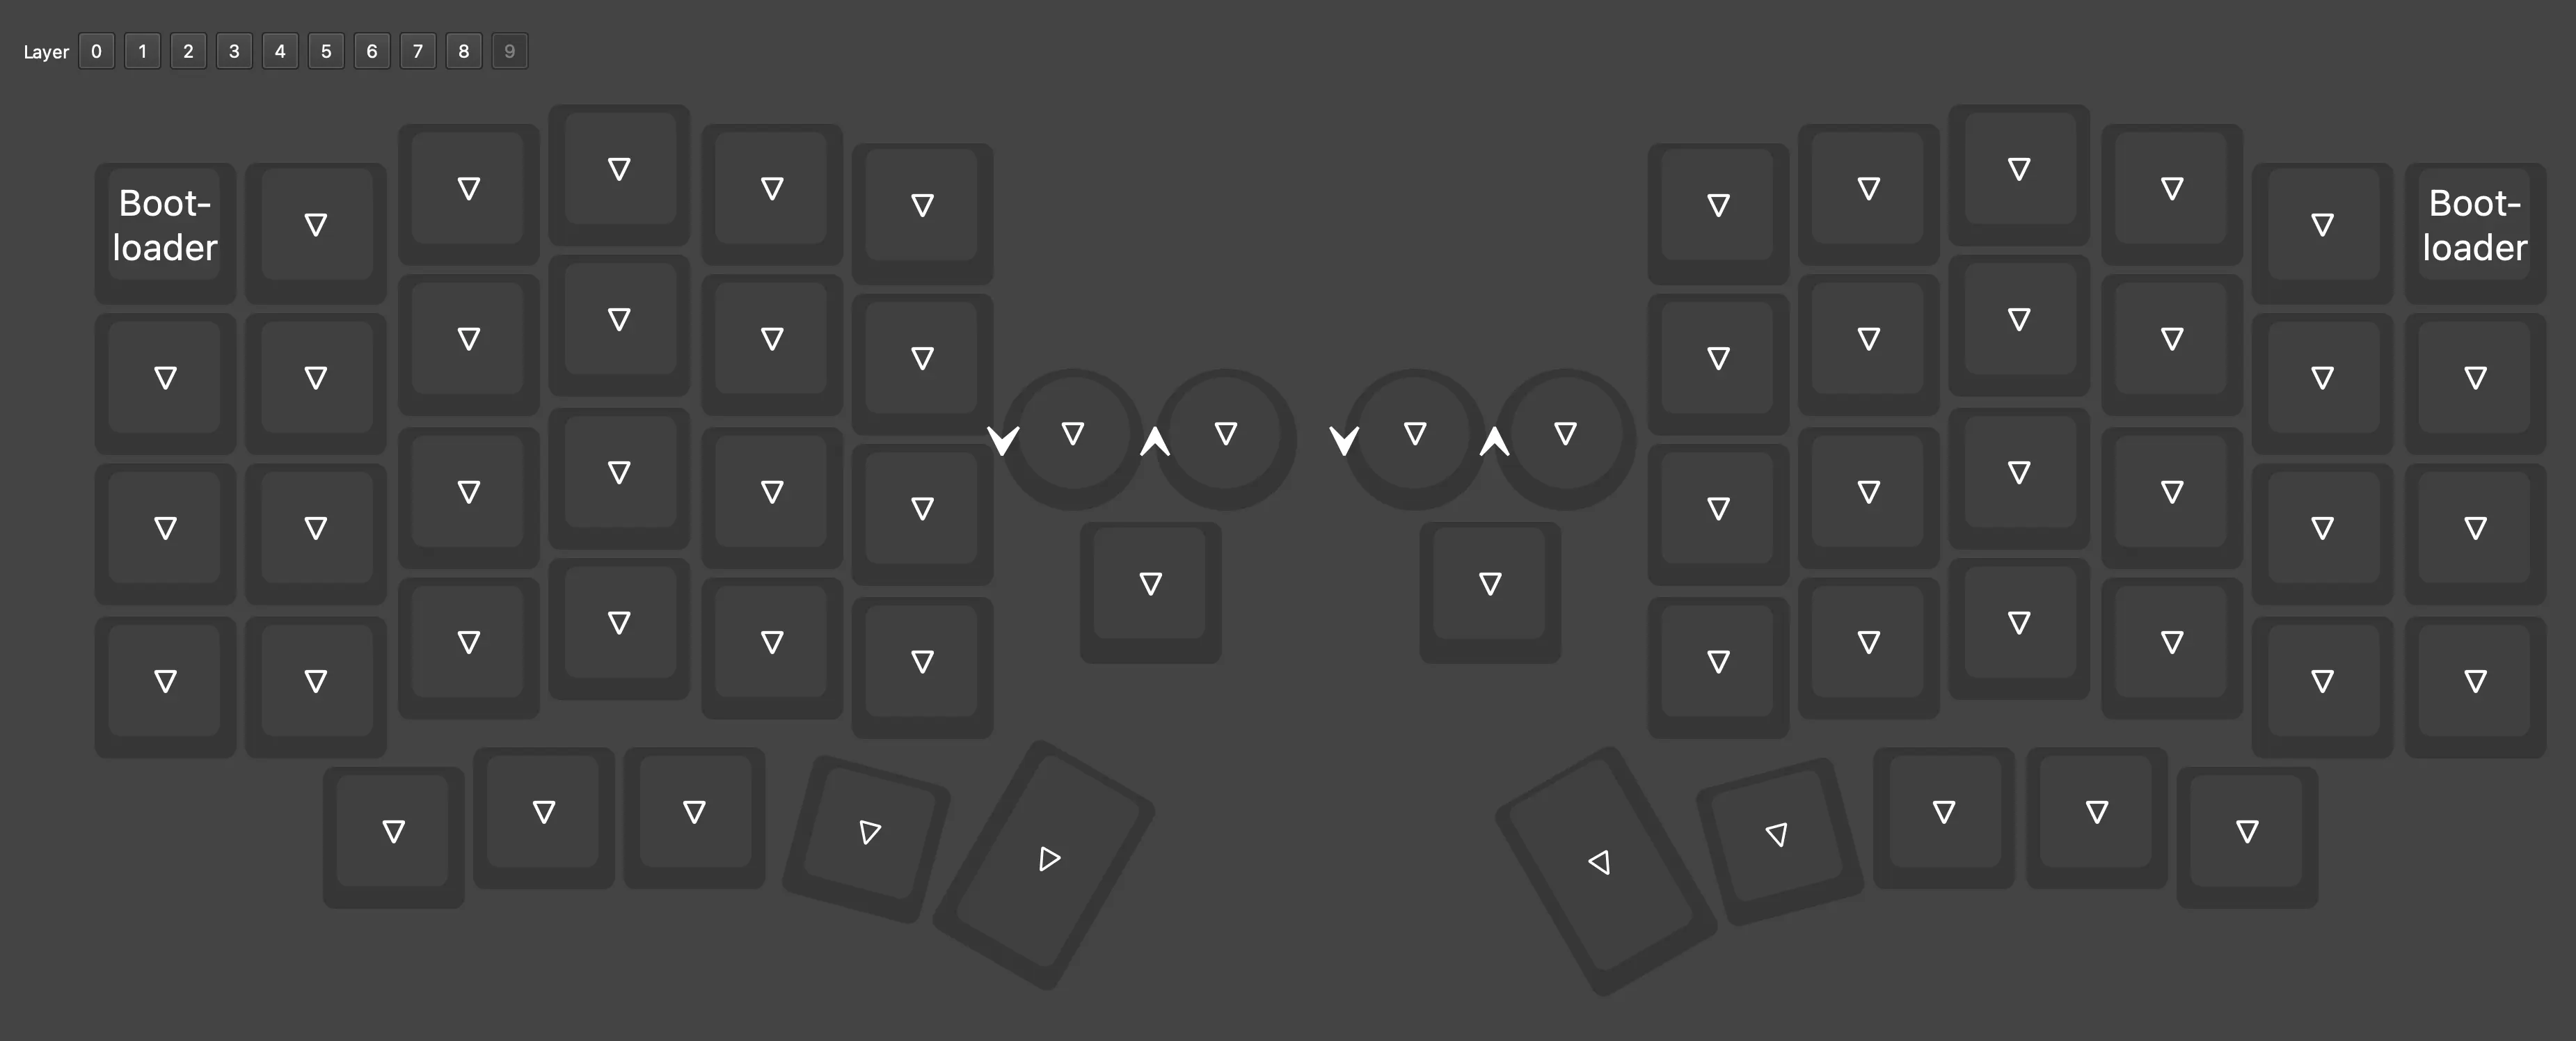
And this is the layout:
Layer 0
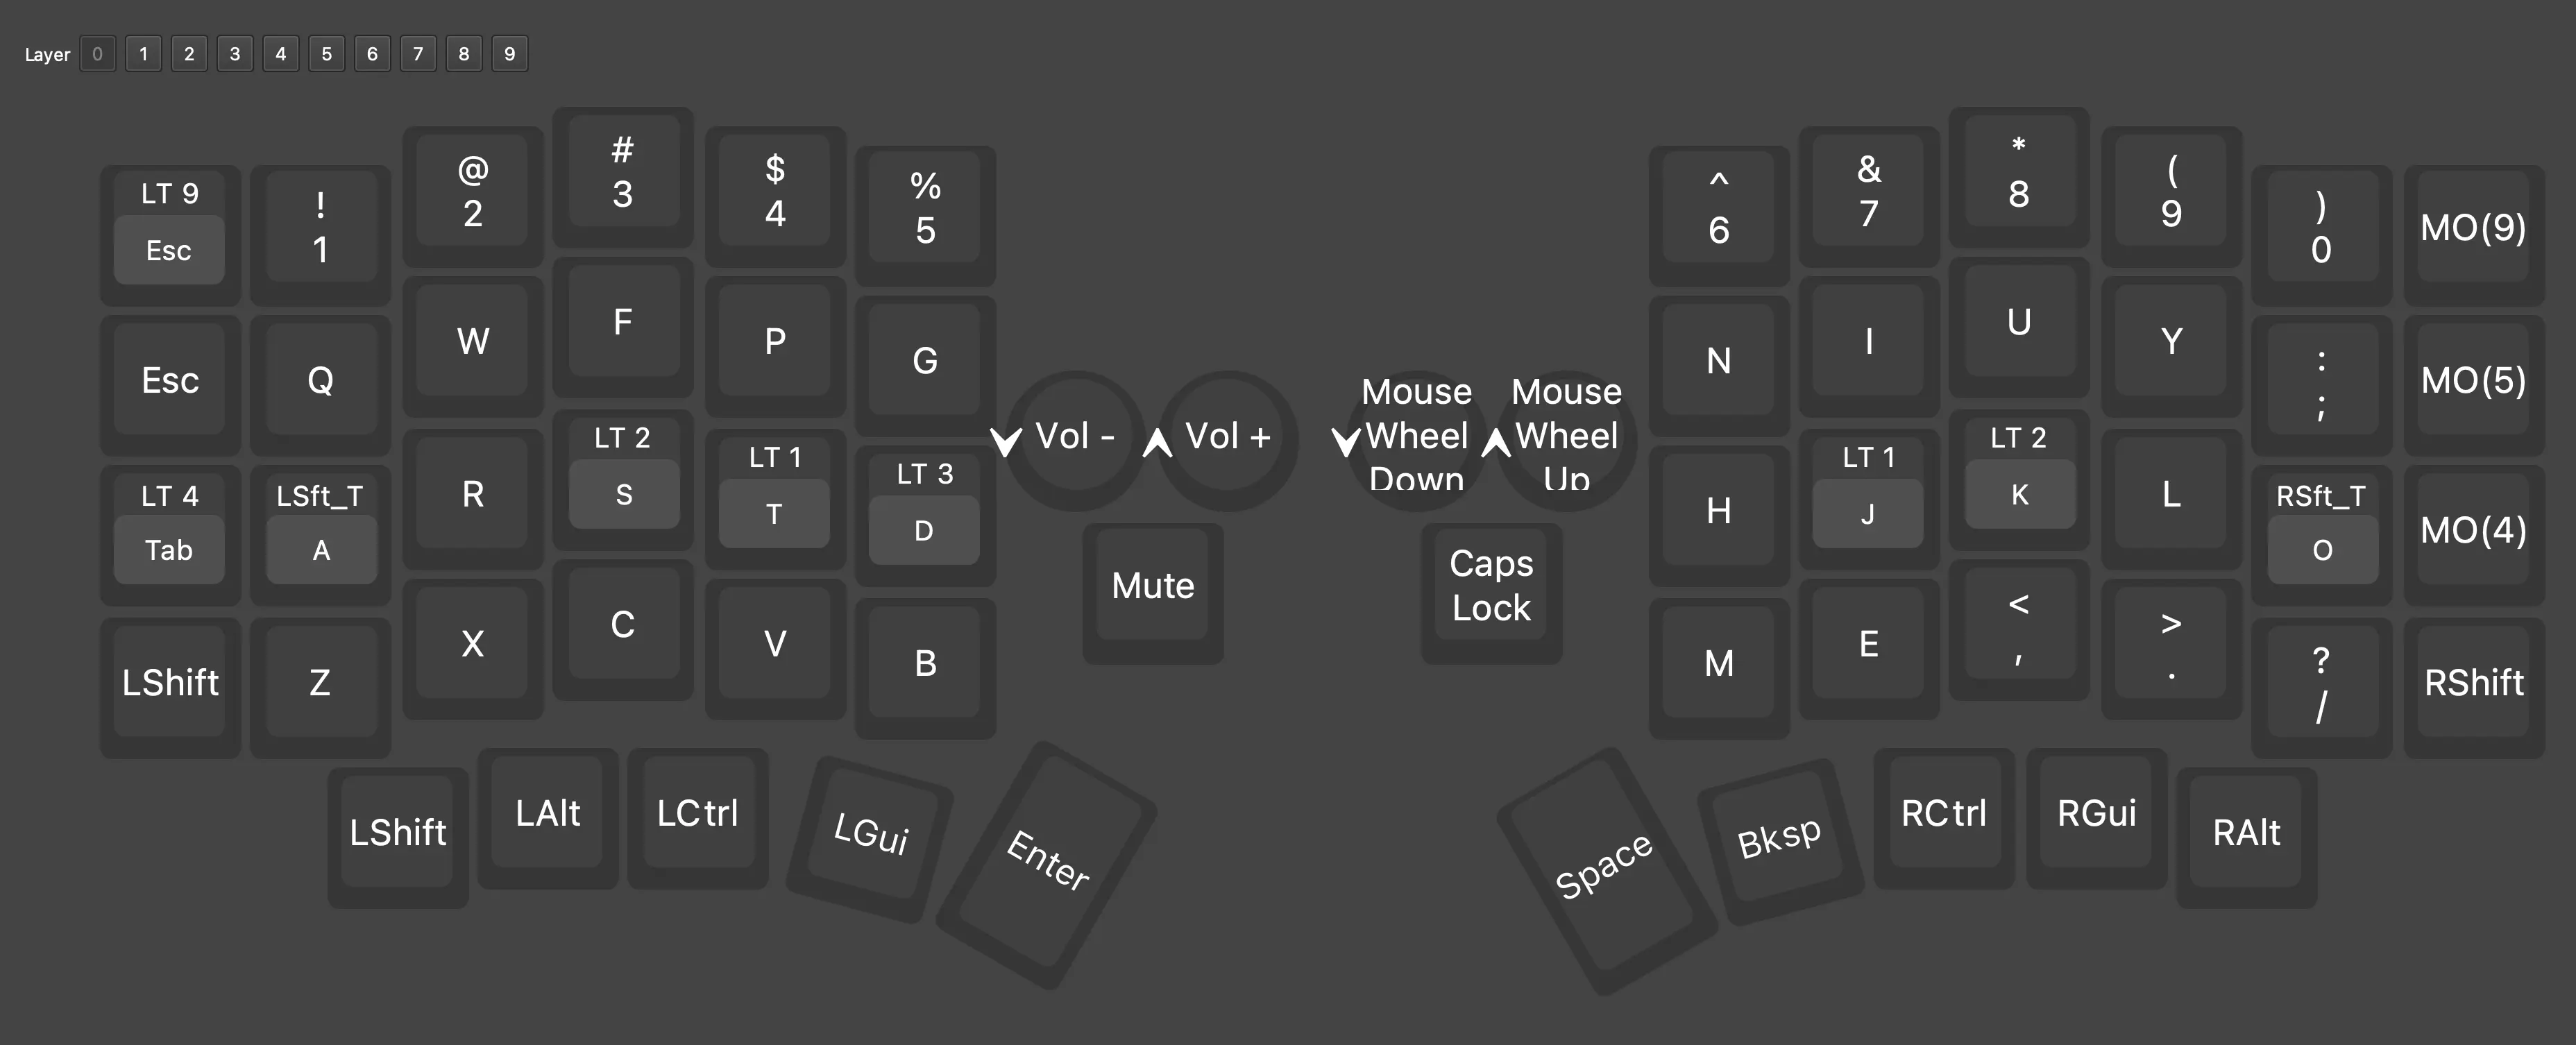
This is also called Base Layer as this is the one that is always active. To access any other layer I have to hold down the corresponding layer key. To explain the layout a bit, I started with Colemak, which looks like this:
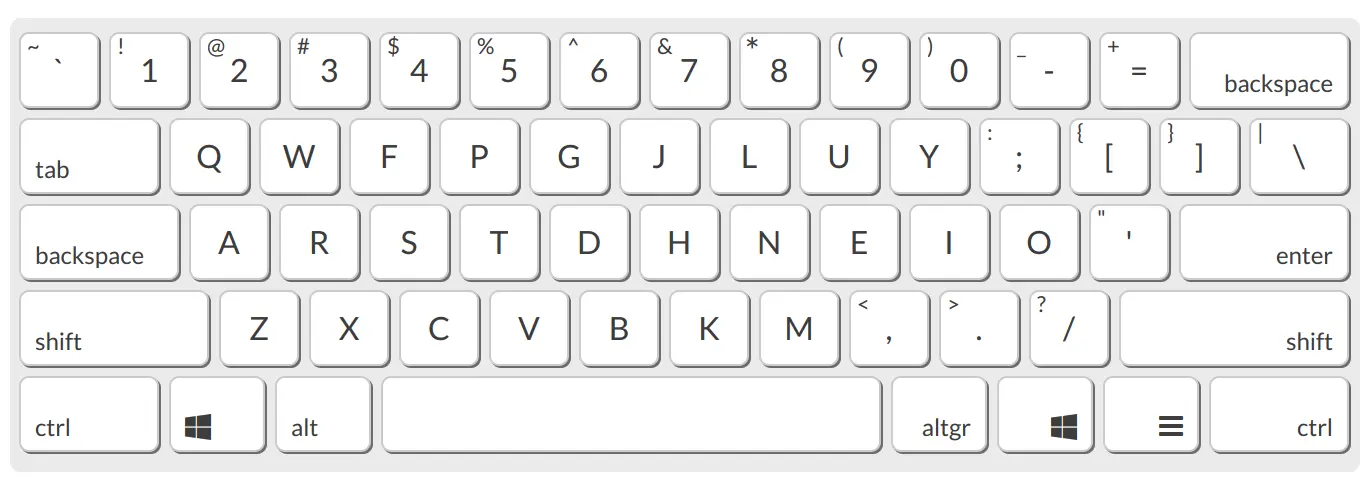
If you compare this to Layer 0 you can see that is almost looks the same, except some keys on the right half, namely the homerow. I am an avid Neovim user btw, which means for navigation I use HJKL. This was on the left homerow before and as I was learning a new layout anyway, this change meant nothing in terms of hindering on typing speed but enabled me to not relearn the most basic navigation in my editor. I also use homerow modifiers, which means I can tap the ‘A’ key for example for a simple ‘A’ press, but if I hold the key down, it is mapped to shift. The same principle applies to keys ‘S’, ‘T’, ‘D’, ‘J’, ‘K’, ‘O’ and on the left side ‘Tab’ and ‘Esc’. The Thumb cluster (thats how the keys at the bottom are called) is well utilized. The bigger keys are used for the common operations ‘Enter’ and ‘Space’, next to ‘Space’ is also ‘Backspace’. This means the thumb now has a way bigger purpose than just pressing the Spacebar. The rest of the thumb cluster has all the modifier. All of this has the endgoal of making my fingers leave the homerow as little as possible.
Layer 1
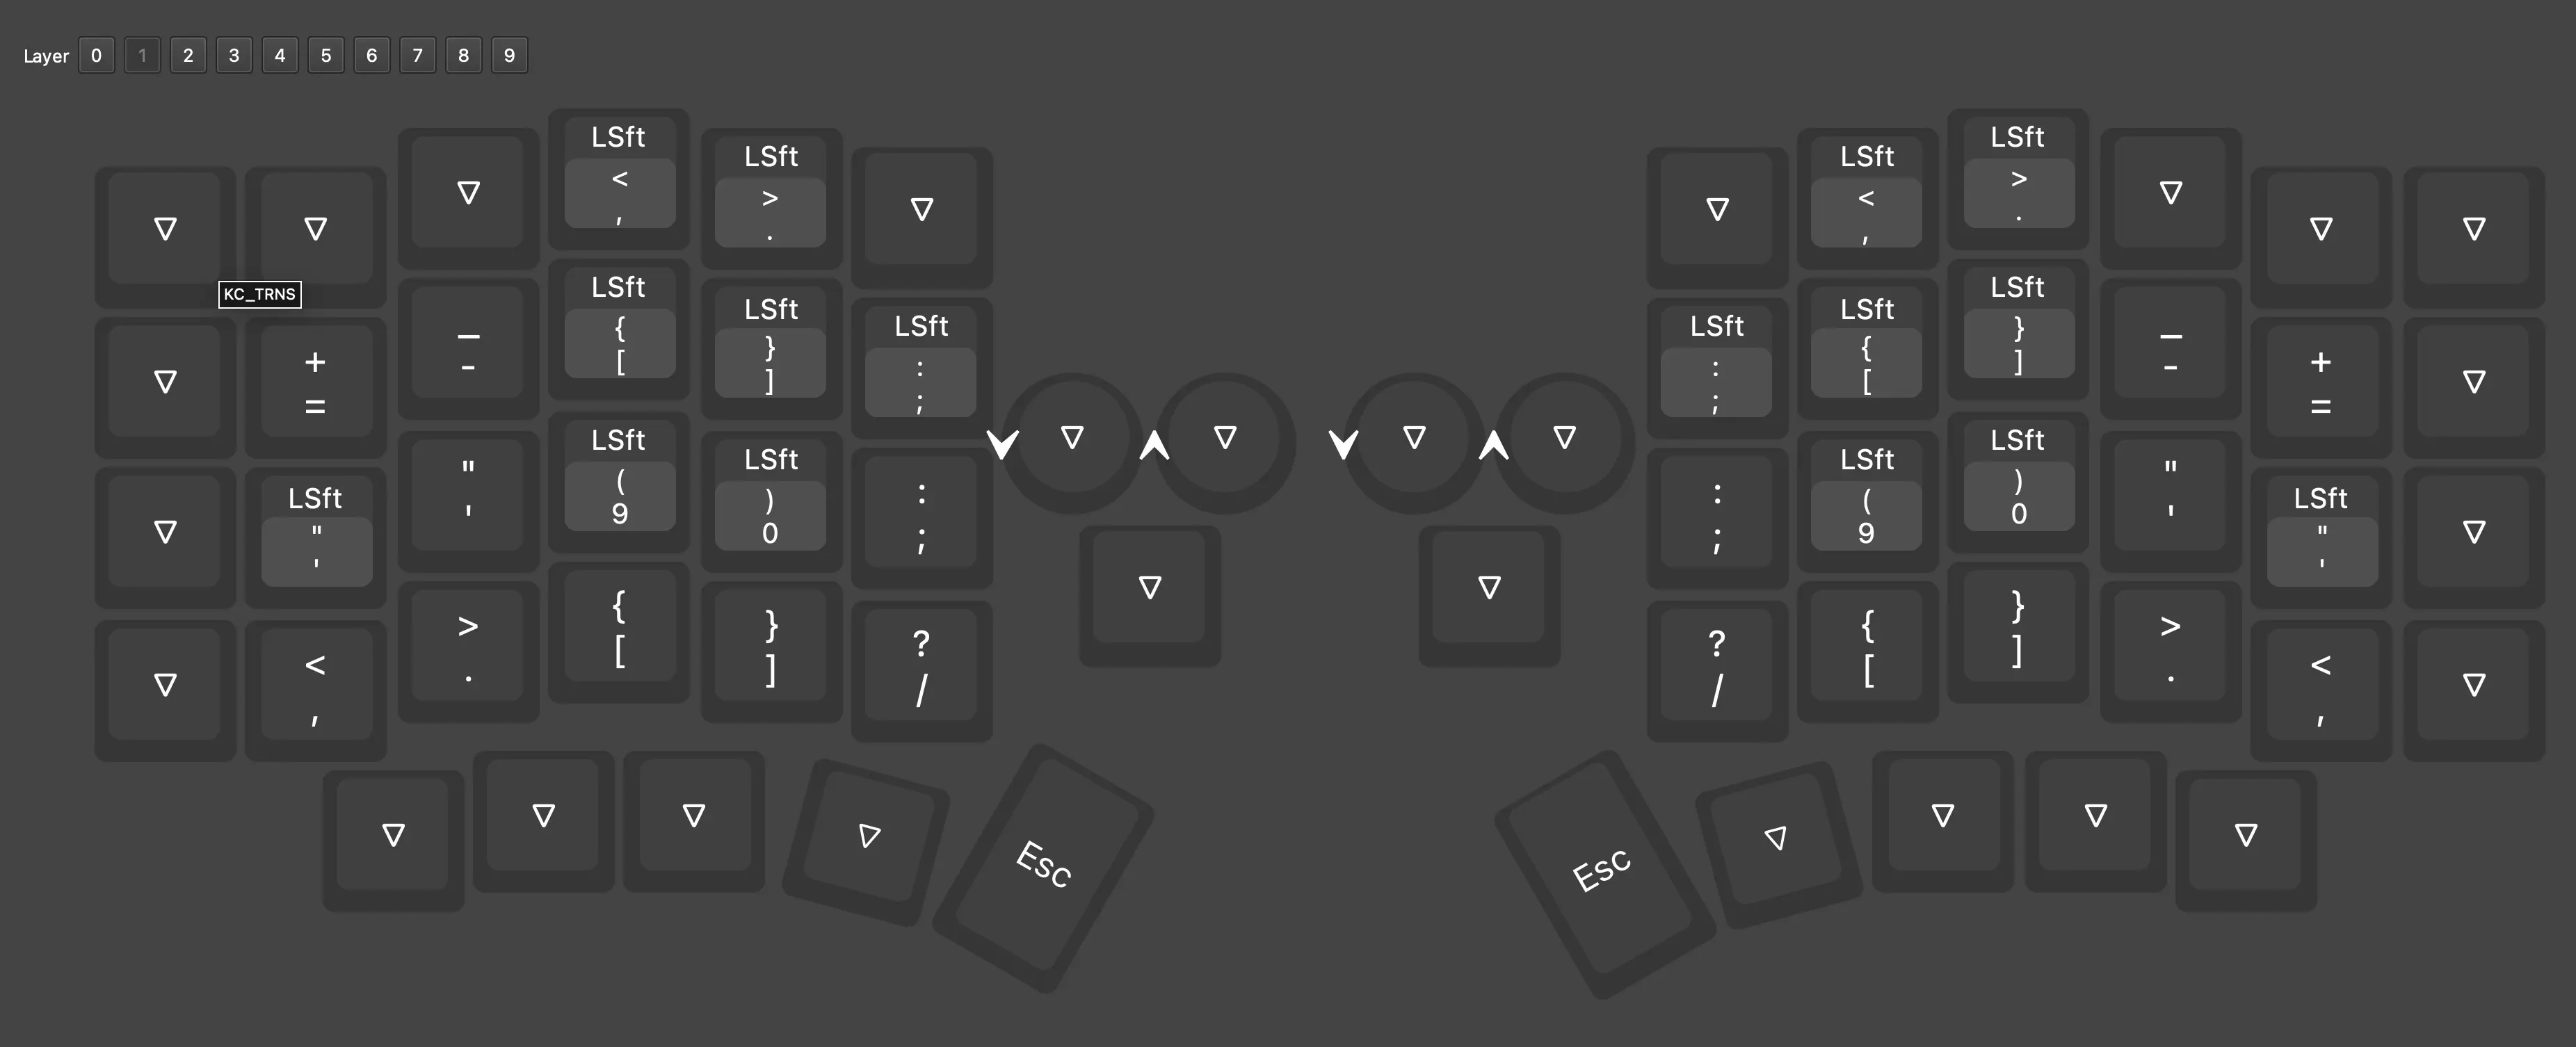
This is the first symbol layer. I have two because there are just so many different symbols and as a programmer they do get quite frequent to type. This layer focuses on the most used symbols and tries to group them together. It’s also more or less symmetric so I can activate the layer with either hand and have the other hand type the actual symbol. The index and middle finger on the homerow have the basic parenthesis as this is pretty much the most used symbol pair in programming (or at least in the languages I use). To get the other types of brackets I use the same fingers and just move them up or down. This logically couples the similar symbols to the same finger and I don’t have to do mental gymnastics to create an array. The other symbols are pretty much just scattered around depending on what I thought how frequent I need them. The more often I need a specific key the closer I want it to my homerow. In practice I already found out that it is hard to predict and I will likely change this at some point.
Layer 2
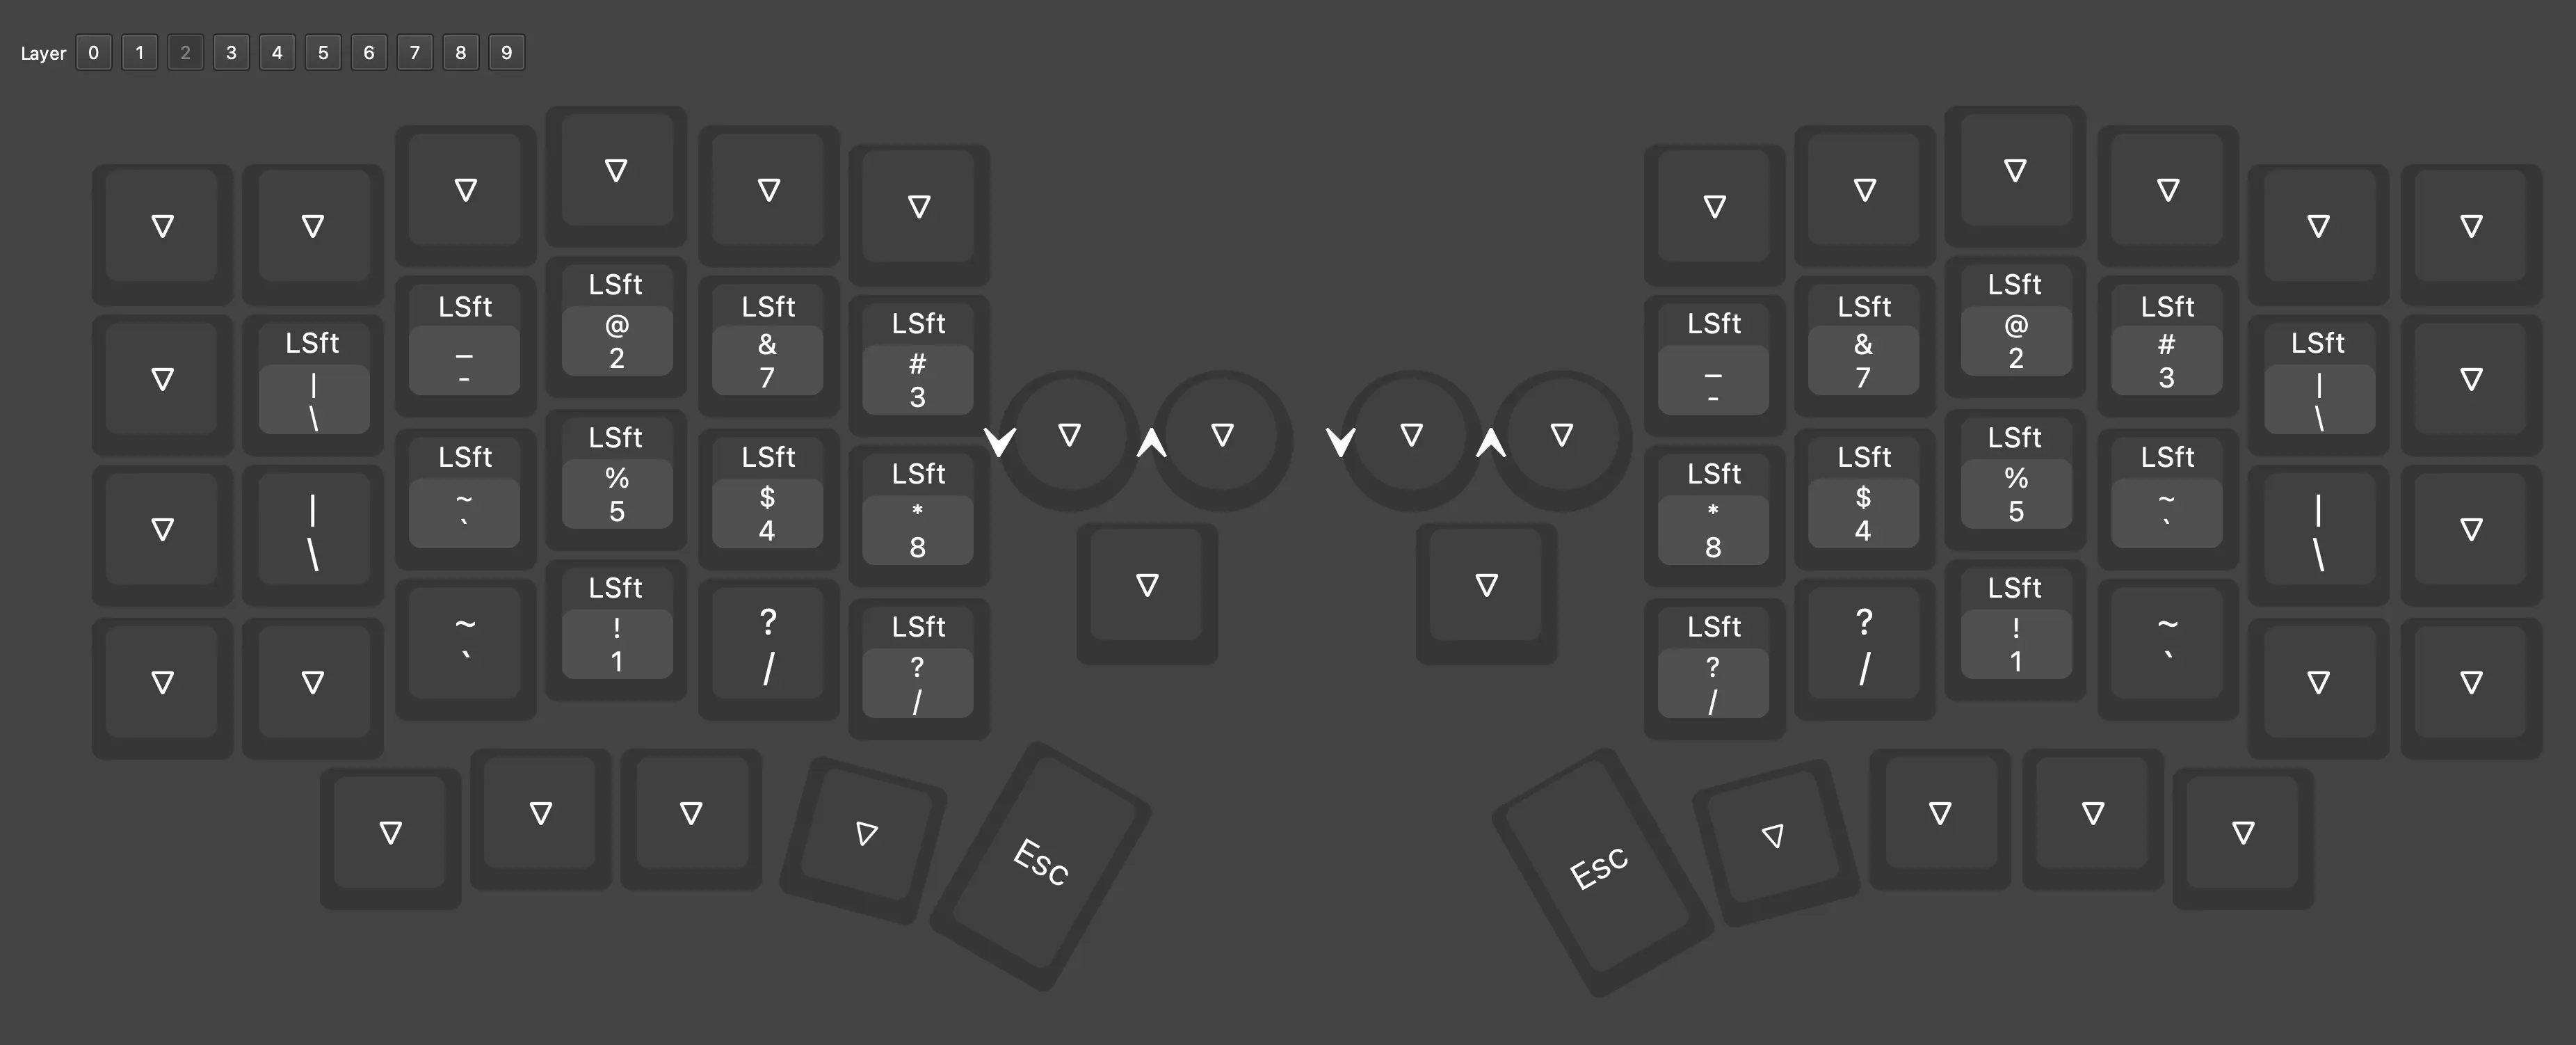
This is the second symbol layer and at it’s core follows the same thought as layer 1. This layer got added quite a bit later than the others so I am the least used to it’s key placement, which is even harder to learn as most of the symbols here are barely used in my day to day work. But this is just a bit more difficult to learn than the rest, not a big deal.
Layer 3
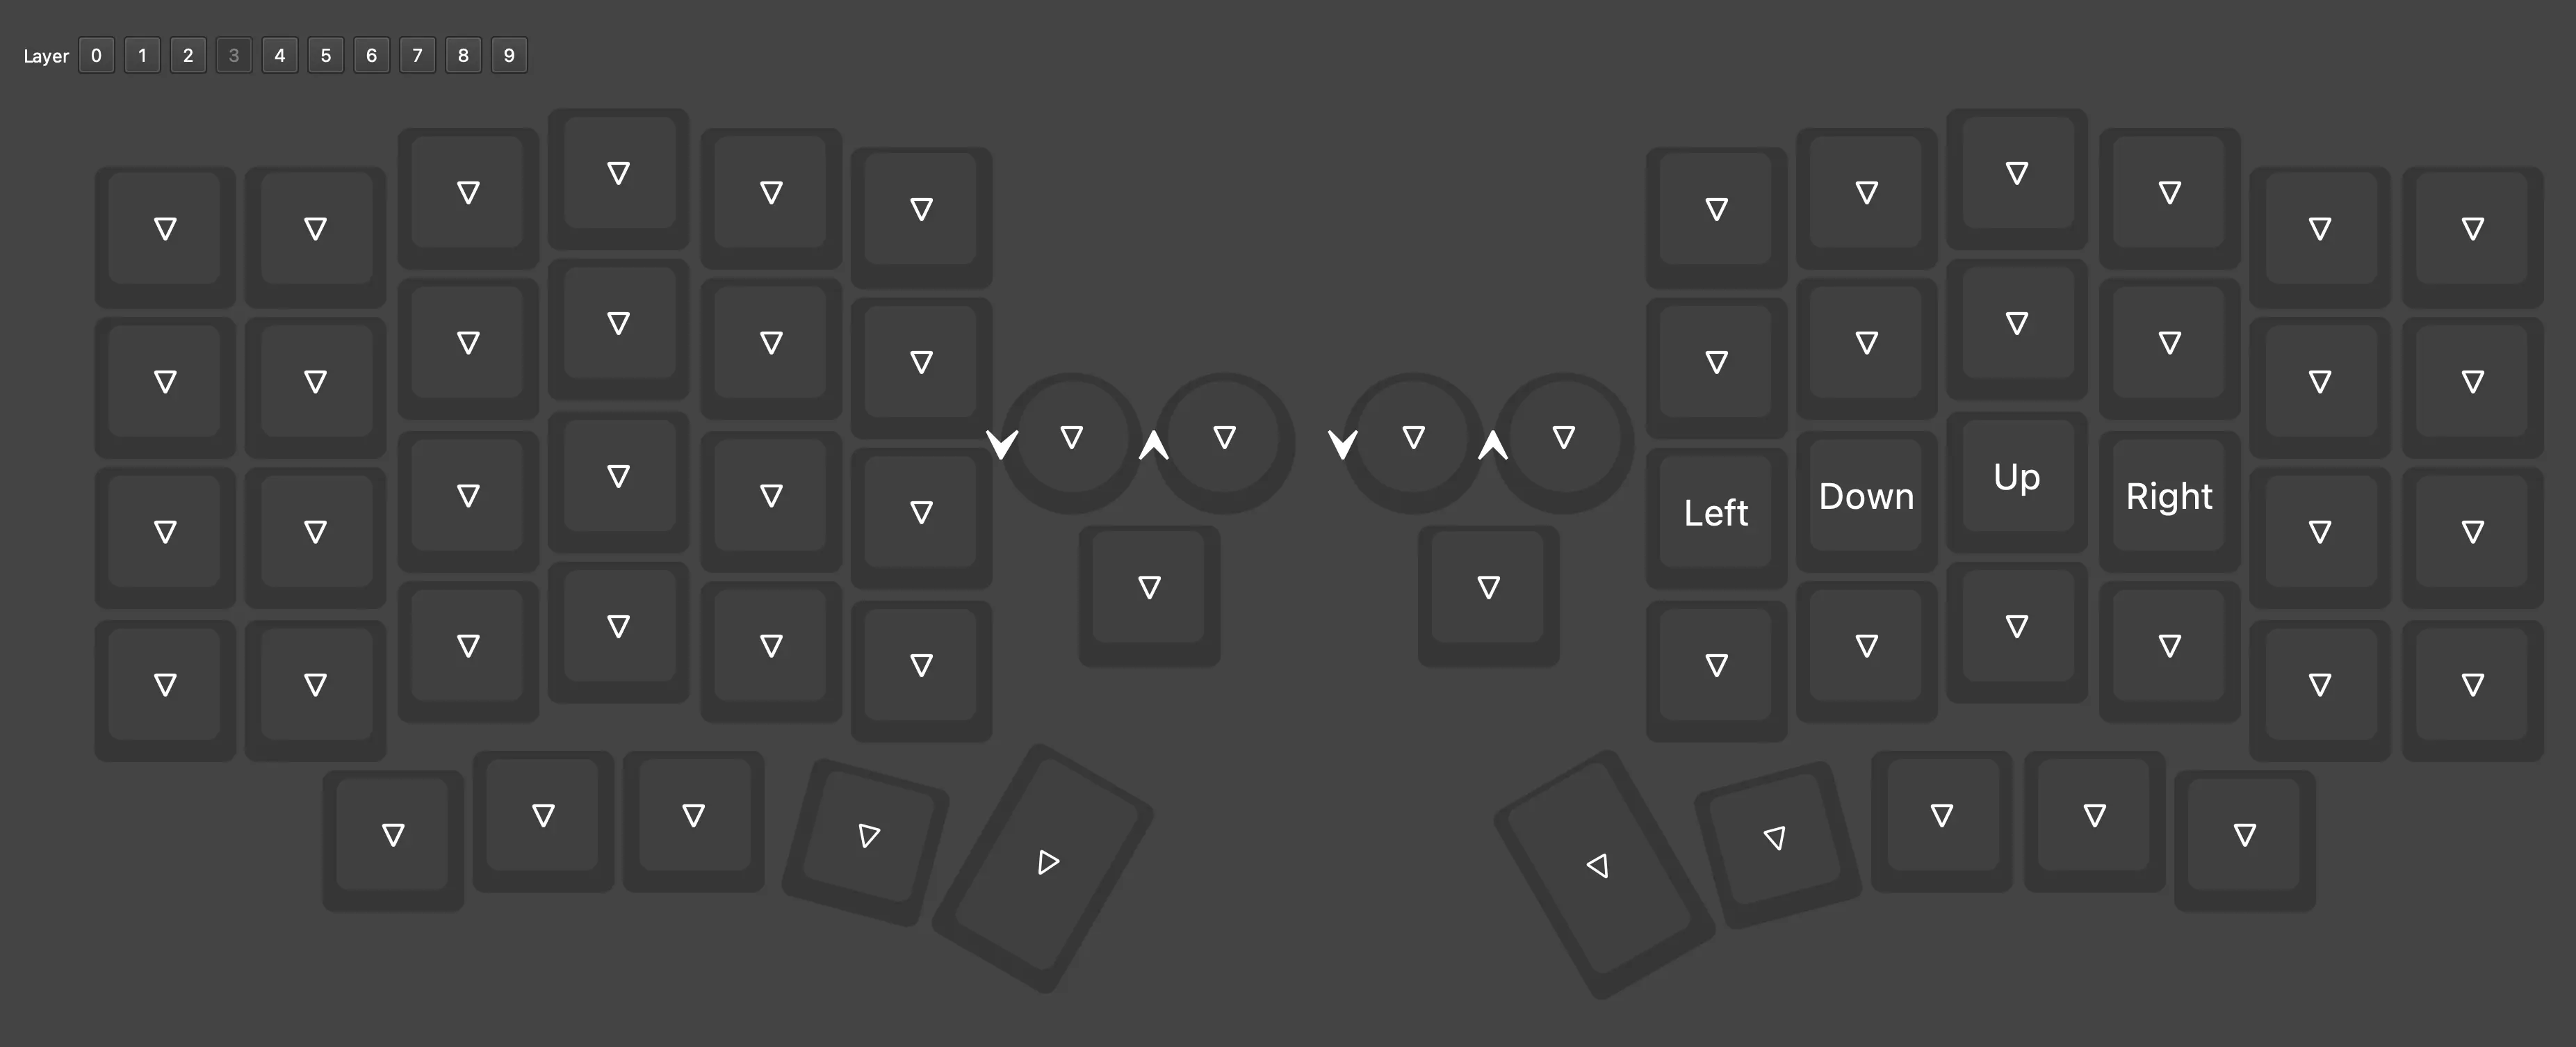
This literally just contains the arrow keys. They are placed so that they mimick the Vim movements with HJKL. This means the arrow navigation outside and inside of Vim is the same, with the only difference holding the ‘D’ key for the arrow keys.
Layer 4
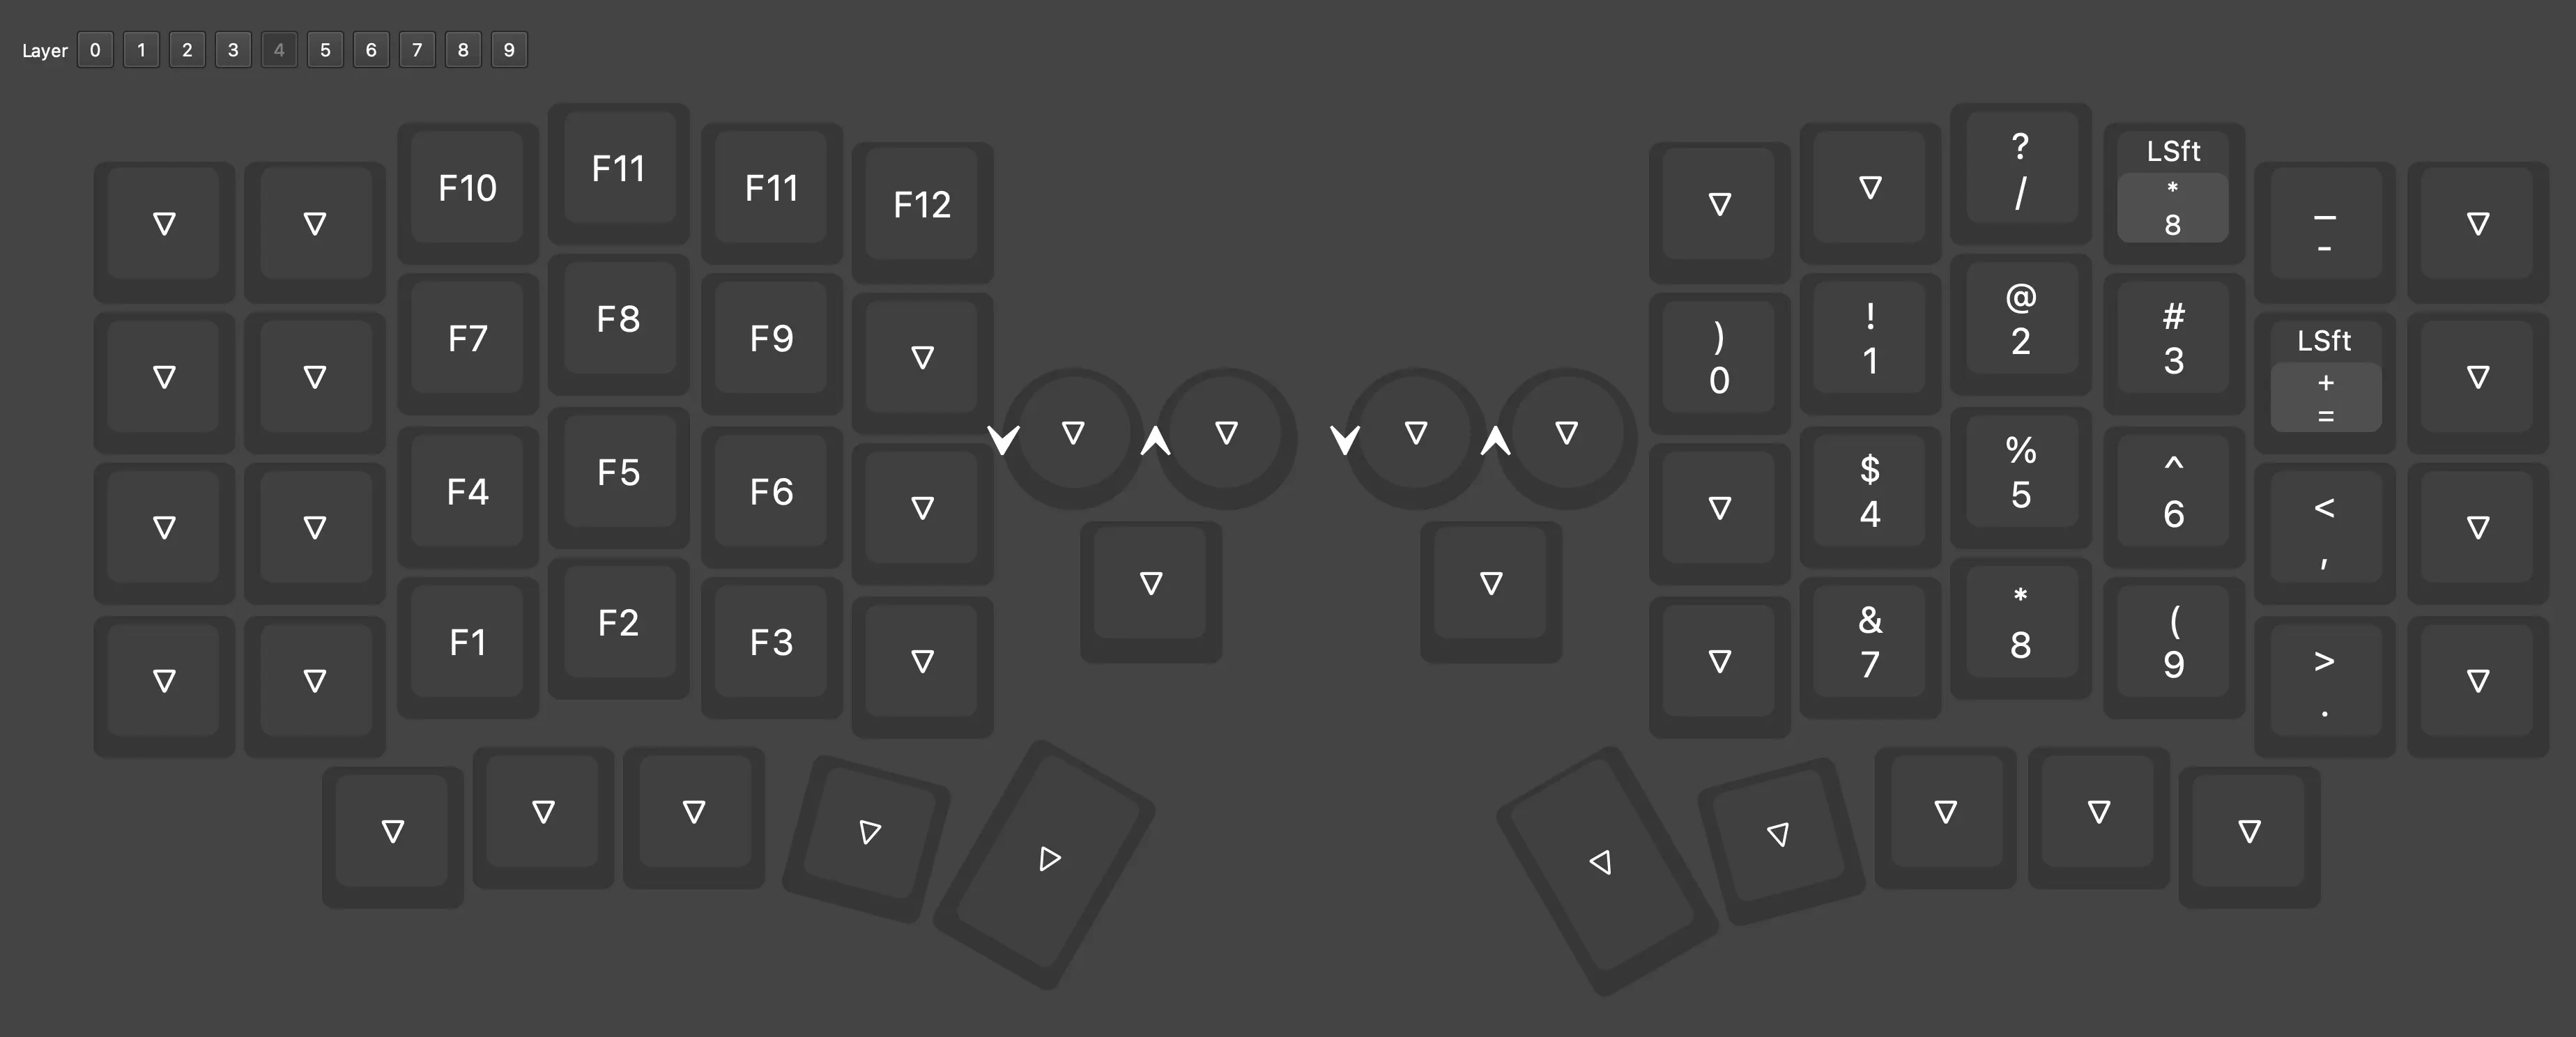
This is supposed to be numpad kinda layer. I am not happy with the symbol placement around the number keys and I will change it in the future, but this is how I have it now. The left side of the keyboard has the F-keys in a similar arrangement. As you can see, I still have all the keys that you have on a full-size keyboard.
Layer 5
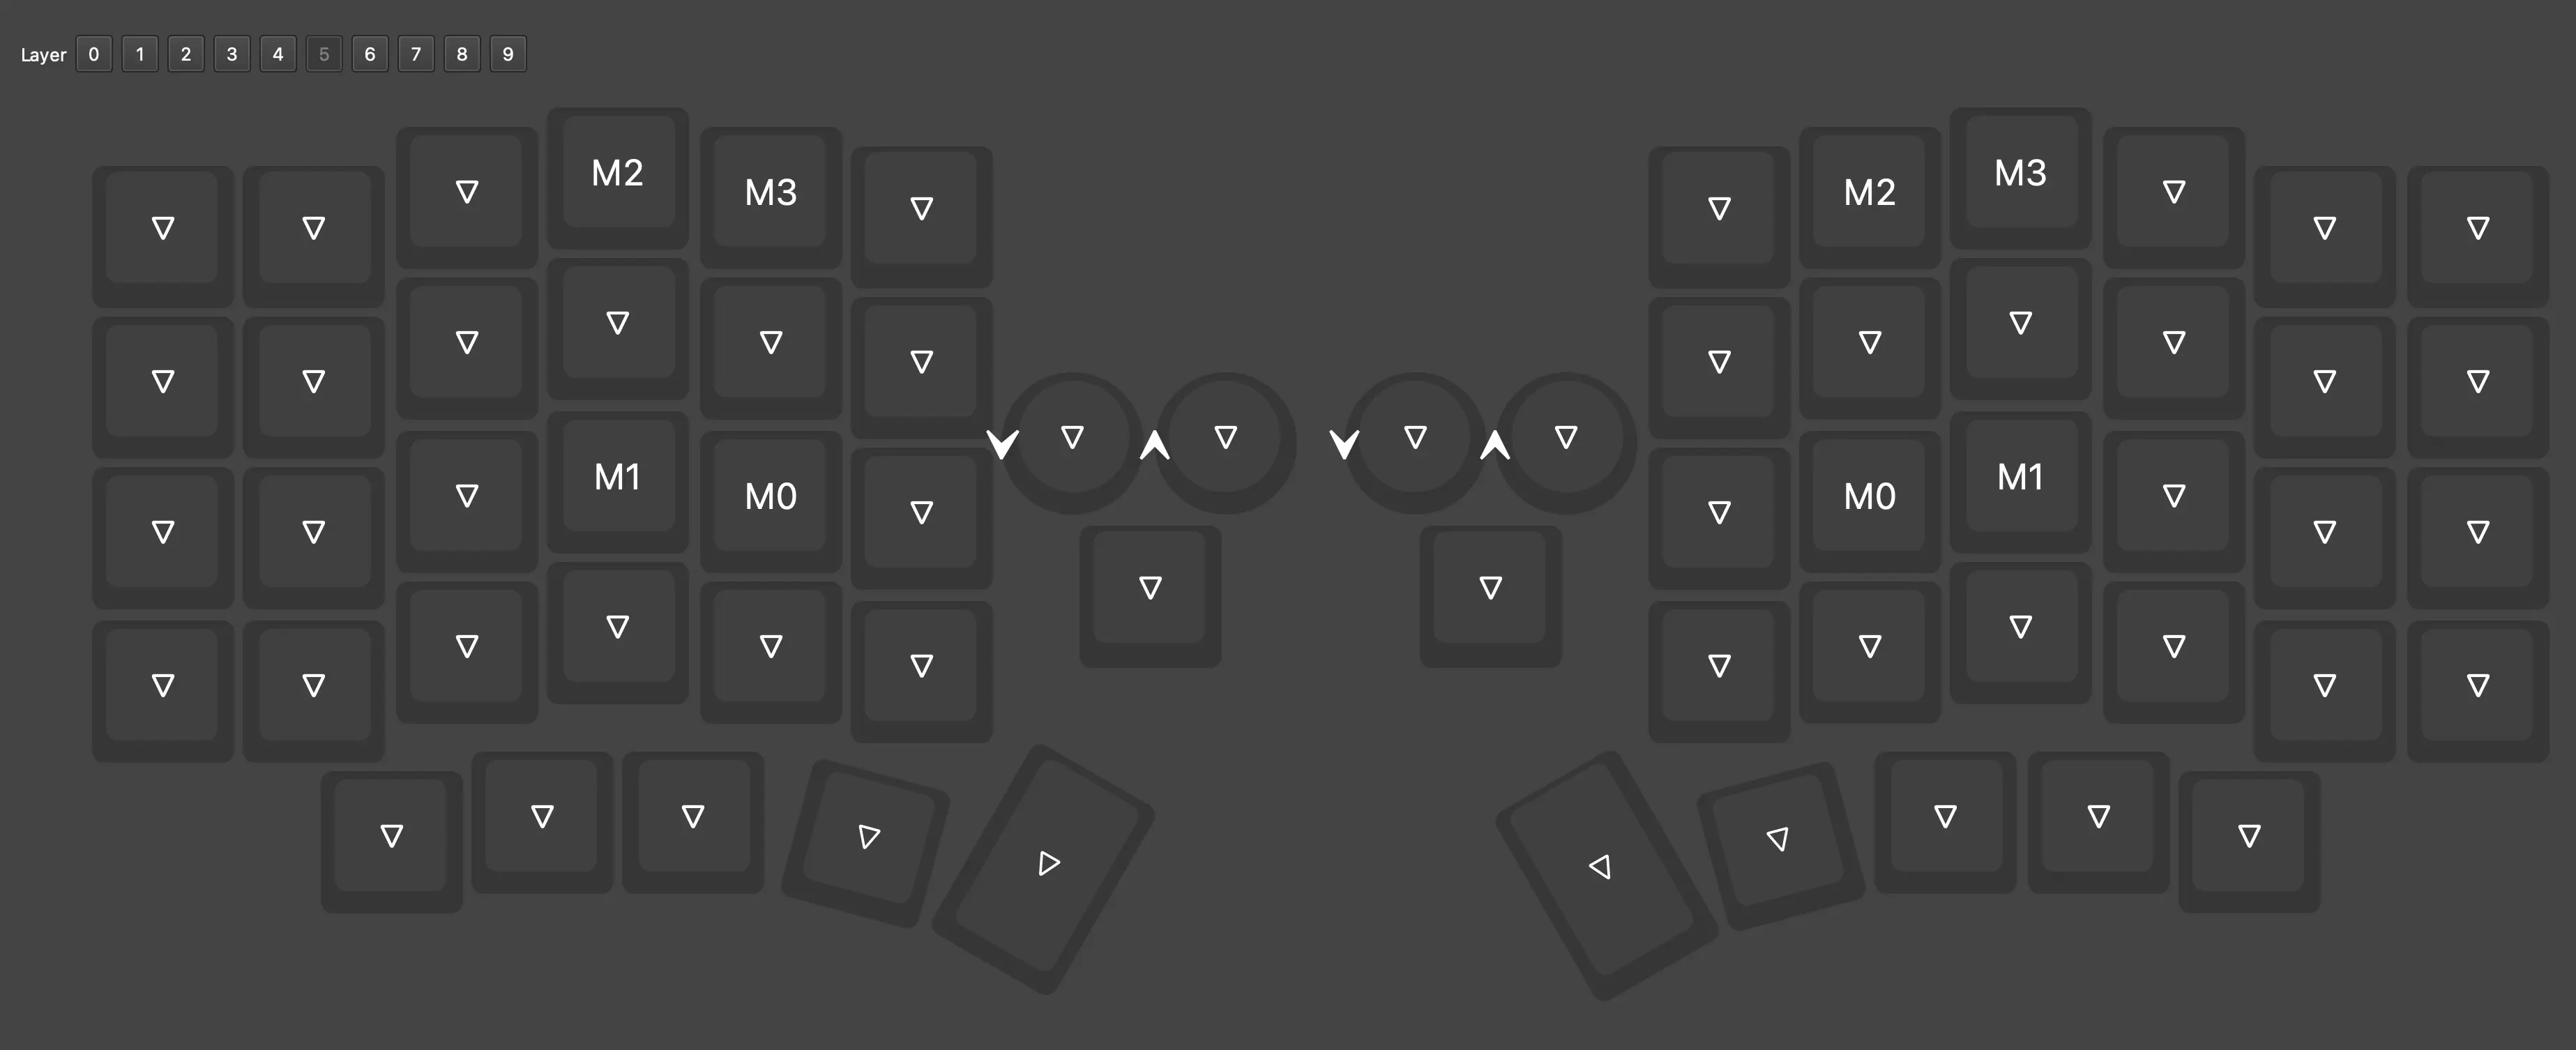
This is a macro layer. I can program macros into the keyboard itself, which then get a dedicated key on this layer. There aren’t many at this point but I suppose when I find more repeating keycombos that are worth it I will add them here.
Layer 9

This is a special layer as it holds only the bootloader keys. Those are for the occassion that I want to re-flash the keyboard with a different firmware. I used this for example to change the behaviour of the LEDs to indicate what keys are active when a different layer is currently active. The positioning of them together with the layout key position means I always have to press both buttons, which also mimicks the default behaviour on some other firmwares/keyboards.
Conclusion
I like this keyboard. I like that I can have my hands further apart, that I can put my mouse or other stuff in between the keyboard, the look, the customizability, the rotary encoders and so on. I am very happy with the keyboard.
The only thing I would change (and likely will change) are the switches. I chose brown tactile switches because I thought I would want that tactile feel, and while they generally feel good, I think I would have preferred linear switches that are a bit more sensitive. Typing on my old keyboard needed less force to activate the switch and now using the new one it feels like I need way more force.
Still, the keyboard itself is very good and I do not regret buying it, even though it will take a while until I can fully type again without thinking about where the key is.